I have been bad at sharing my projects this year, it is a whole month since my last post.
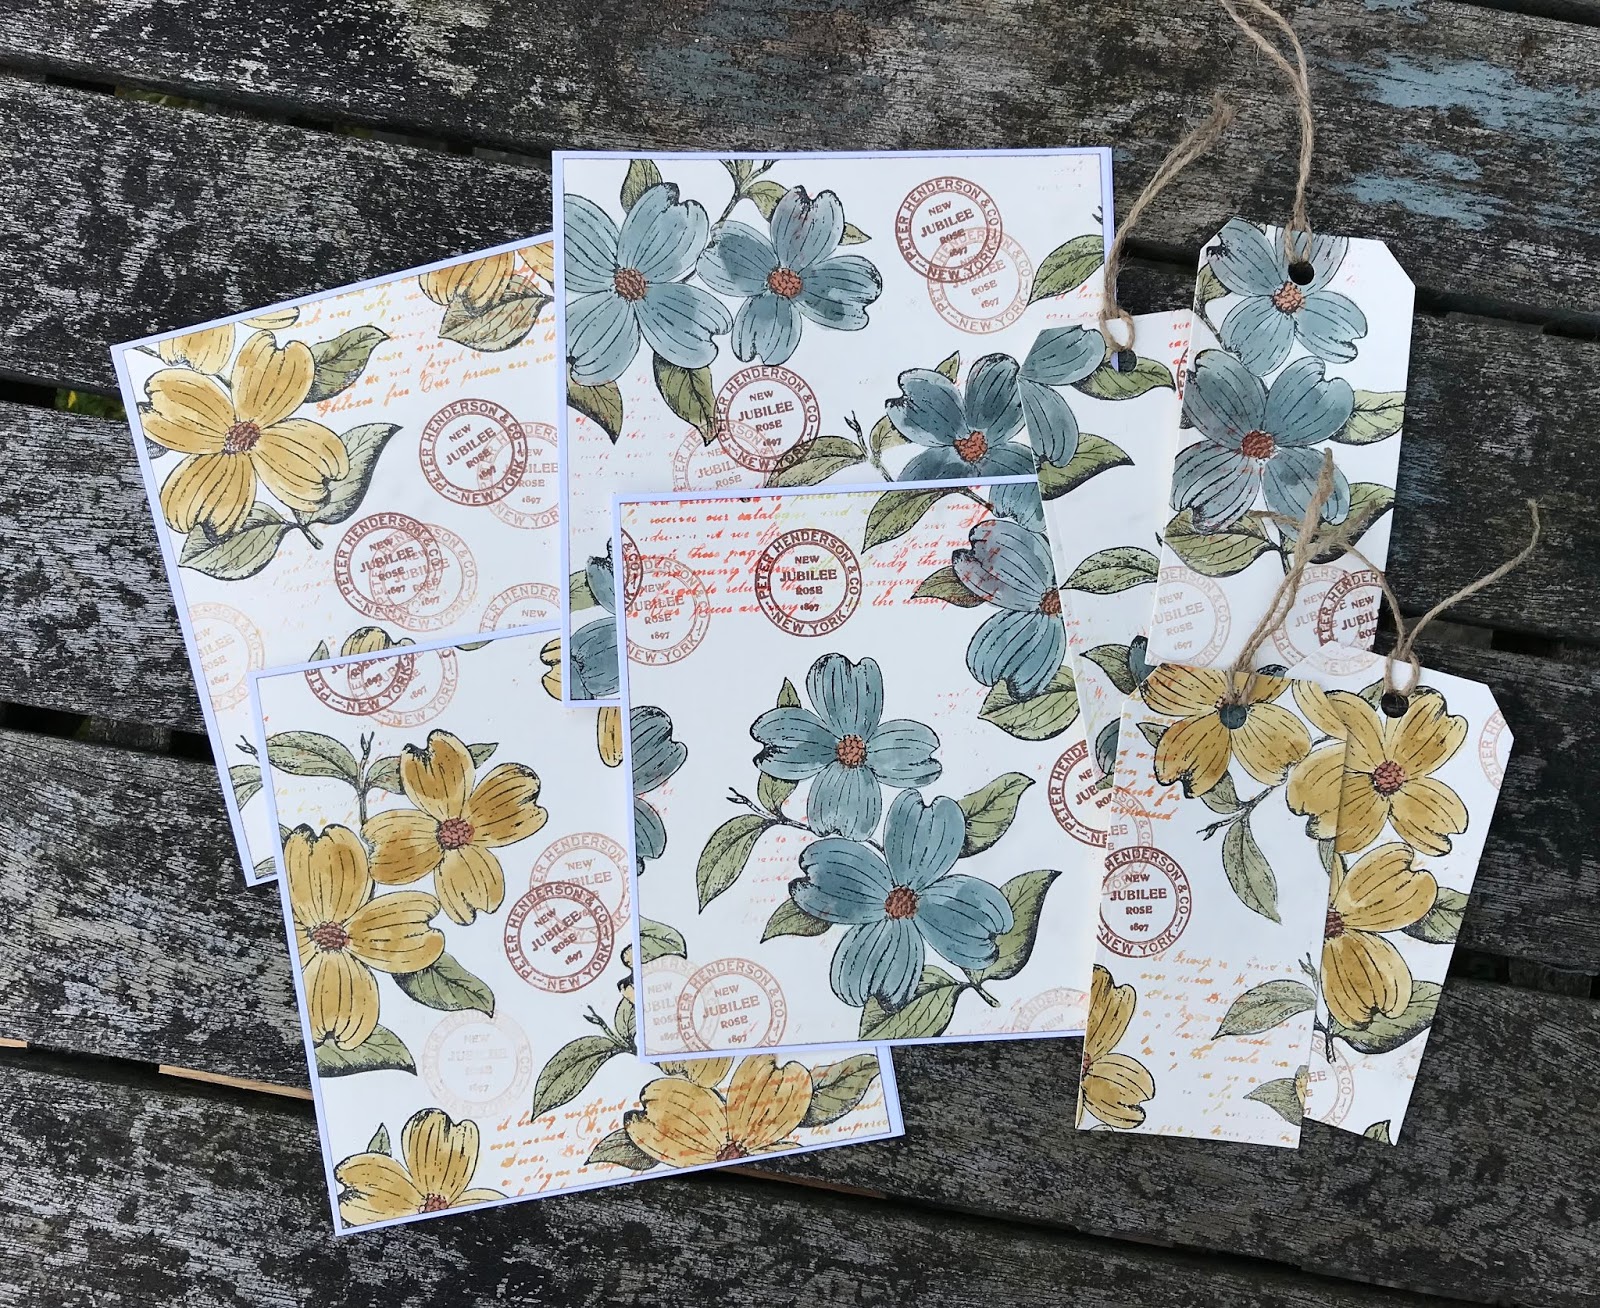
Here is a quick post to show some cards and tags I made after being inspired by Raquel's YouTube video from Scrapcosy.
This is a link to the video:
https://www.youtube.com/watch?v=hTp7-GS7wlQ
I used the idea of making a masterboard and painted the flowers with infusions. I used Sunset Beach and In the Navy on two A4 sheets of cream card stock. I got two 6 x 6 inch cards and two tags from each sheet. Rather than use infusions for the text, I used distress ink spritzed with water.
Stamps used : ESC18 by Scrapcosy for PaperArtsy
Infusions : In the Navy and Sunset Beach
Sepia and black archival ink for the stamping
Now I have a nice stash of floral cards with matching tags for any occasion.
I hope you like them.
Sunday, 1 September 2019
Saturday, 3 August 2019
Whimsical Birds
Here are a couple of projects I made using Tando Creative Whimisical birds 2. I had the birds in my stash for a couple of years just waiting for a bit of painting so I started playing with them last weekend and finished them off today.
The first bird is mounted in a painted MDF frame and the second whimsy bird family picture is just mounted on black mount board. If I can find a cheap frame I might frame it.
The bird is painted with Pink Ink multi-surface paint and the frame painted with Fresco paint (Captain Peacock). The bubbles are stamped with IndigoBlu "Bubbles Background" stamp and the pattern around the frame is a Tim Holtz stamp by Stampers Anonymous. Doodles were added with black and white paint pens.
It was good fun painting all those chipboard shapes and assembling the birds. A great way to get back into painting again.
Thank you for visiting and I hope these bring a smile.
Sunday, 19 May 2019
Rainbow Bird
This weekend's offering is the beautiful kingfisher designed by Maria Kitano for Crafty Individuals.
I tried this stamp out using a couple of techniques, first on watercolour card and the second, which I will show here, is stamped on cream card and painted with distress ink. The background is also a Crafty Individuals stamp where I used distress ink (cracked pistachio and mermaid lagoon) and spritzed with a little water. I like the watercolour effect fading away in the background.
Stamps used : Crafty Individuals CI-430 and CI-510
"Rainbow bird - that sets the stream alight with burn and glitter!" - Robert Macfarlane
I tried this stamp out using a couple of techniques, first on watercolour card and the second, which I will show here, is stamped on cream card and painted with distress ink. The background is also a Crafty Individuals stamp where I used distress ink (cracked pistachio and mermaid lagoon) and spritzed with a little water. I like the watercolour effect fading away in the background.
Stamps used : Crafty Individuals CI-430 and CI-510
"Rainbow bird - that sets the stream alight with burn and glitter!" - Robert Macfarlane
Sunday, 12 May 2019
Moon Pods
I had some playtime today with Lavinia stamps and distress oxides. Here are the results using my new Moon Pods stamp.
Frayed burlap, antique linen and faded jeans distress oxide inks with some frayed burlap distress ink on the edges. The fairy barnacle is stamped with VersaFine Clair (Twilight), my first time using Versafine Clair. It is good for detail stamps and is very juicy, maybe because it is new. The moon pods and sprite are stamped using VersaFine black ink and the picture is finished off with a sprinkling of fairy dust (frosted lace stickles).
... and here is a small panel showing off the lovely detail on the moon pods.
For the background on this one I used faded jeans, antique linen and aged mahogony distress oxides on watercolour card stock.
I hope you like them.
Back soon, off to wash my inky fingers.
Sunday, 5 May 2019
PaperArtsy Topic 2019 #6 FISH
There is something fishy going on, this is my first post of 2019 and it is May already. I've not been idle but have a lot of catching up to do.
Fossil fish stamp from PaperArtsy.
The background is a mix of Fresco paints with some Golden Sands infusions on top to try to make it look like sandstone.
I'll try not to leave it so long before I post the next project and will visit blogs very soon.
Have a great weekend x
Fossil fish stamp from PaperArtsy.
The background is a mix of Fresco paints with some Golden Sands infusions on top to try to make it look like sandstone.
I'll try not to leave it so long before I post the next project and will visit blogs very soon.
Have a great weekend x
Saturday, 15 December 2018
Clean and Simple Christmas
A clean and simple Christmas card for you today using Darcy's stag from PaperArtsy (EDY16).
This is a 5" by 5" card, the background kraft card is embossed with snowflakes and Christmas words from one of Tim Holtz 2017 stamp sets are around the border. It wasn't that quick to make as I had to fussy cut the stag after I had coloured him with Copics but there is no inky, painty business going on so nothing to clean up afterwards.
This will probably be my last post before Christmas so wishing you all a very Merry Christmas and best wishes for the festive season.
This is a 5" by 5" card, the background kraft card is embossed with snowflakes and Christmas words from one of Tim Holtz 2017 stamp sets are around the border. It wasn't that quick to make as I had to fussy cut the stag after I had coloured him with Copics but there is no inky, painty business going on so nothing to clean up afterwards.
This will probably be my last post before Christmas so wishing you all a very Merry Christmas and best wishes for the festive season.
Sunday, 2 December 2018
Festive Overlays
More Christmas cards have been made in super quick time thanks to Tim Holtz 2018 Holiday Hacks YouTube video inspiration. Here is the video if you have not seen it :
https://www.youtube.com/watch?v=K6UI-lKvOl4
My cards, all stamped with Distress ink (not oxides);
I've also used the same stamps for some other designs which are my own, here is one example;
The small holly branch makes a nice background but the interesting thing with this one was the blue that comes out in the stamping when you use frayed burlap distress oxide. I think my stamp was slightly damp when I stamped with it as it had been cleaned previously with a baby wipe.
This is a great set, probably my favourite of the 2018 TH Christmas release.
The Country View Challenge theme for December is Christmas so I would like to enter my stag Christmas card in that challenge.
Wednesday, 21 November 2018
Stencil Trees
I am sharing a quick post today of two little Christmas cards I have made using the Tim Holtz shifter tree layering stencil.
Tim Holtz Stencil THS113
The sentiment is from Festive Overlay CMS357 by Stampers Anonymous Tim Holtz Collection.
The trees on the right are using Tumbled Glass and Evergreen Bough Distress Oxides and on the left, Peeled Paint and Cracked Pistachio.
I have made quite a lot of Christmas cards this year, if I get the time I will post some more.
Bye for now.
Friday, 9 November 2018
2018 Topic 19 : Tissue Paper
For the PaperArtsy challenge this time, the topic is tissue paper. Lots of options with this topic and I have chosen to use bleeding art tissue. Here is the challenge link with the inspiration: PaperArtsy Topic 19 : Tissue Paper
My completed entry is a card but when I started playing I wasn't entirely sure where I was going with this.
Here is the card using the bleeding art tissue technique for the background and stamped tissue paper flowers.
I used my new stamps that I got with my win for topic 17 the other week: JOFY 62.
I started by die cutting lots of hexagons from tissue paper, arranged them on the watercolour card and painted them with water.
My completed entry is a card but when I started playing I wasn't entirely sure where I was going with this.
Here is the card using the bleeding art tissue technique for the background and stamped tissue paper flowers.
I used my new stamps that I got with my win for topic 17 the other week: JOFY 62.
I started by die cutting lots of hexagons from tissue paper, arranged them on the watercolour card and painted them with water.
See how the colours bleed into one another, isn't it lovely. At this point I had to walk away and not be tempted to peep. I think I left it for about 20 minutes. Then I peeled off the tissue when it was dry. This is the result :
The colours have bled into one another but still we see the hexagon shapes. This is a good technique for backgrounds.
I stamped the JOFY flowers onto some book pages and cut them out and also stamped the flowers on white tissue. They were applied to the card with Mod Podge. I finished it off with a bit of doodling with a gold pen and mounted it on the card.
I hope you like this one.
Thanks to everyone who commented on my last post, I really appreciate those comments.
Bye for now.
Saturday, 6 October 2018
2018 Topic 17 : Colour - A Box of Eggs
The latest PaperArtsy challenge is a colour challenge which is always fun. Here is the link:
2018 Topic 17 : Colour - A Box of Eggs
There are many colours of eggs so I picked a few pastel colours from my Fresco paint stash and made a postcard. During the week I was stuck in traffic going home one night after work so that was a good opportunity to think up some ideas as I was going nowhere fast that night. I had several ideas and if I get time I will do them, strangely, this postcard was not one of them. This little project was just to get in the mood.
The photo looks darker than the postcard actually is as it is a grey rainy day today, perfect for doing craft projects though.
2018 Topic 17 : Colour - A Box of Eggs
There are many colours of eggs so I picked a few pastel colours from my Fresco paint stash and made a postcard. During the week I was stuck in traffic going home one night after work so that was a good opportunity to think up some ideas as I was going nowhere fast that night. I had several ideas and if I get time I will do them, strangely, this postcard was not one of them. This little project was just to get in the mood.
The photo looks darker than the postcard actually is as it is a grey rainy day today, perfect for doing craft projects though.
Stamps used;
PaperArtsy ESC01 and ESC04 by Scrapcosy
Fresco Paints;
Ice Blue, Sage, Seaglass, Vintage Lace, Concrete
Ink;
Watering Can archival ink and Limestone dye ink (Altenew)
Monday, 10 September 2018
One Cup at a Time
PaperArtsy Challenge Topic 15 : Artist Trading Coins
I like this challenge because I like artist trading coins and you can pretty much do anything that takes your fancy as long as the coins are 2.5 inches in diameter. Click on the linked title to go to the PaperArtsy blog and see the great selection of inspiration posted there.
Here are my tea themed artist trading coins using the lovely Scrapcosy tea stamps from ESC16.
Materials used:
Fresco Paints : Peach Nectar (the new Courtney Franich paint), Concrete, Vintage Lace (not the new Courtney paint, it is a very old one, one of my first purchases. I wonder if it is exactly the same as the new one).
Stamps : PaperArtsy Eclectica ESC16 by Scrapcosy
Watering Can archival ink
Have a good week everybody x
#scrapcosy
I like this challenge because I like artist trading coins and you can pretty much do anything that takes your fancy as long as the coins are 2.5 inches in diameter. Click on the linked title to go to the PaperArtsy blog and see the great selection of inspiration posted there.
Here are my tea themed artist trading coins using the lovely Scrapcosy tea stamps from ESC16.
Materials used:
Fresco Paints : Peach Nectar (the new Courtney Franich paint), Concrete, Vintage Lace (not the new Courtney paint, it is a very old one, one of my first purchases. I wonder if it is exactly the same as the new one).
Stamps : PaperArtsy Eclectica ESC16 by Scrapcosy
Watering Can archival ink
Have a good week everybody x
#scrapcosy
Sunday, 29 July 2018
Time for Tea
I have new toys to play with and it rains at last outside so I have an excuse to play all day.
I made a tag just to get into the mood although I have already way to many ideas for using my new Scrapcosy stamps from PaperArtsy. The trouble with too many ideas is that I mess around and don't actually produce anything for ages. I want to make a mini book, some cards, ATCs, a canvas and more but there are just not enough spare hours so I will exercise some control ... for now.
The first thing I wanted to do is enter the PaperArtsy Challenge #13 : Colour - Mint, Sage, Claret and Gold. That is a colour combination that works really well for vintage designs.
Here is my tea themed tag :
I made a tag just to get into the mood although I have already way to many ideas for using my new Scrapcosy stamps from PaperArtsy. The trouble with too many ideas is that I mess around and don't actually produce anything for ages. I want to make a mini book, some cards, ATCs, a canvas and more but there are just not enough spare hours so I will exercise some control ... for now.
The first thing I wanted to do is enter the PaperArtsy Challenge #13 : Colour - Mint, Sage, Claret and Gold. That is a colour combination that works really well for vintage designs.
Here is my tea themed tag :
I used images from the new release stamp set ESC16 by Scrapcosy, the new Seaglass Fresco paint for the background and infusions to colour the images mixed with matte glaze. The lace and word cloud are stamped and embossed with WOW metallic brass sparkle and the spoon has metallic glaze on it to make it shiny.
The cup was stamped on smooth stamping card which had a pale blue wash of stormy sky oxide so it is not a stark white. All the images were fussy cut and the cup mounted with some foam pads to give it dimension.
So the tag ended up as a clean vintage design rather than the more grungy vintage that I originally had in mind but I am quite pleased with it. Seriously, those stamps are so good I reckon you can do anything in any style with them and get a good result.
A close up of the word cloud and don't you think that postage stamp is cute.
OK, that's me done for today. I'm off to make some tea. x
Sunday, 15 July 2018
Artist Trading Coins
The hot weather is getting to me, making me lethargic. To get motivated to do something, I watched a couple of YouTube videos today hoping to get a bit of inspiration. I'm never disappointed, there is so much talent out there.
I found a great demo/tutorial by Mike Deakin for Artist Trading Coins (AT Coins), a new trend in miniature works of art which I had not tried until today.
Here is the link to Mike's blog with the video embedded:
https://mikedeakinart.com/other-mixed-media/snippits-artist-trading-coins/
I pretty much followed the tutorial but I used Fresco paints for my backgrounds. These are fun to make and a good size for experiments too. I like to make small things. The coins are 2.5 inches in diameter.
Here are my coins :
Happy Sunday everyone. x
I found a great demo/tutorial by Mike Deakin for Artist Trading Coins (AT Coins), a new trend in miniature works of art which I had not tried until today.
Here is the link to Mike's blog with the video embedded:
https://mikedeakinart.com/other-mixed-media/snippits-artist-trading-coins/
I pretty much followed the tutorial but I used Fresco paints for my backgrounds. These are fun to make and a good size for experiments too. I like to make small things. The coins are 2.5 inches in diameter.
Here are my coins :
Ingredients I used:
Paperartsy Fresco Paints
Tim Holtz Paper Dolls
Tim Holtz Big Chat stickers
Potting soil archival ink
Happy Sunday everyone. x
Sunday, 1 July 2018
Lino Cut Hares
A quick post today as it has been some time since I shared anything on my blog. I have been lost.
This is a card I made using Hobby Art Lino Cut Hares clear stamp set CS208D.
An easy card as it just required a bit of masking and stamping and colouring with Copic pens.
Happy July everybody x
This is a card I made using Hobby Art Lino Cut Hares clear stamp set CS208D.
An easy card as it just required a bit of masking and stamping and colouring with Copic pens.
Happy July everybody x
Saturday, 2 June 2018
Paper Dolls
PaperArtsy challenge Topic 10 : Paper Dolls
I just love these Tim Holtz paper dolls. Each character fires up my imagination. Who are they? What are they thinking?
These two are all dressed up but tough, serious little girls. I sent them out into the early summer woodland where there are foxgloves, butterflies and the sounds of birds singing.
Here is my small canvas for the challenge;
I just love these Tim Holtz paper dolls. Each character fires up my imagination. Who are they? What are they thinking?
These two are all dressed up but tough, serious little girls. I sent them out into the early summer woodland where there are foxgloves, butterflies and the sounds of birds singing.
Here is my small canvas for the challenge;
Ingredients.
Rubber Stamps : PaperArtsy EKC08 by Kay Carley
Fresco Paints : Glacier blue, Venice blue, Spanish mulberry and Steel grey.
Washi tape
Tim Holtz paper dolls
Tim Holtz paper punch butterfly
Happy weekend everybody x
Sunday, 20 May 2018
Vintage Neutrals
PaperArtsy challenge Topic 9 : Vintage Neutrals.
A great topic and some fabulous inspiration on the PaperArtsy blog. For my project I decided on a tag and my inspiration was Alison Bomber's beautiful tag which you can see under the above link.
My tag is nothing like Alison's apart from using Tim Holtz paper dolls for the focal image. I have used one of Alison's lovely quotes from the Dreaming and Doing set (Eclectica EAB07).
A great topic and some fabulous inspiration on the PaperArtsy blog. For my project I decided on a tag and my inspiration was Alison Bomber's beautiful tag which you can see under the above link.
My tag is nothing like Alison's apart from using Tim Holtz paper dolls for the focal image. I have used one of Alison's lovely quotes from the Dreaming and Doing set (Eclectica EAB07).
I started with a painted background with Chutney and Tikka Fresco paint which looked too dark so I knocked it back with some watered down gesso. Still too dark so I dry brushed chalk fresco paint on top of that. Then I used a Kay Carley stencil (PS061) to add some leaf fronds. The paint I used was Irish Cream.
I tried a bit of crackle glaze which worked a little but not very well, I will need to practice.
I added some flowers from ESC03 by Scrapcosy stamped with watering can archival ink and stamped the quote on a Tim Holtz die cut wood plank which I had painted with chalk and white fire paint. A couple of brads and a button to finish it off.
The photo looks a bit blue, that's the photography, there is no blue on my tag!
A great topic again and a chance to use some paper dolls. I am quite pleased with this one.
Sunday, 6 May 2018
Handmade Matchbox
PaperArtsy Challenge Topic 8 : Boxes.
Last weekend when I saw the PaperArtsy challenge inspiration, the example that caught my eye was the matchbox art. I have never tried making a box so retrieved my old envelope punch board that has been gathering dust on the shelf and searched the internet for instructions to make a matchbox. I found a good one and made a test box out of kraft card. The test box worked so became my final box.
Here is the You Tube video I found:
http://www.ddstamps.com/dd_stamps/2013/12/another-box-using-the-stampin-up-envelope-punch-board.html
Thanks to Diane Dimich for the instructions.
I decorated my box with Jofy images from stamp sets 13 and 24, stamped directly onto the box and stamped onto old book pages. What to put in the box? Well, it is always useful to have a few gift tags to pop on presents so I made three matching gift tags.
Here is my matchbox project.
Last weekend when I saw the PaperArtsy challenge inspiration, the example that caught my eye was the matchbox art. I have never tried making a box so retrieved my old envelope punch board that has been gathering dust on the shelf and searched the internet for instructions to make a matchbox. I found a good one and made a test box out of kraft card. The test box worked so became my final box.
Here is the You Tube video I found:
http://www.ddstamps.com/dd_stamps/2013/12/another-box-using-the-stampin-up-envelope-punch-board.html
Thanks to Diane Dimich for the instructions.
I decorated my box with Jofy images from stamp sets 13 and 24, stamped directly onto the box and stamped onto old book pages. What to put in the box? Well, it is always useful to have a few gift tags to pop on presents so I made three matching gift tags.
Here is my matchbox project.
I decorated the inside of the box.
.... a view of the front of the match box.
.... and the three tags.
That project was a good way to relax after spending the morning tackling the wilderness that is my garden on such a hot day.
Until next time, have a great weekend everybody. x
Sunday, 22 April 2018
Crafting with Kraft : PaperArtsy Topic 7
Kraft card is so versatile and I really like the natural effects you can achieve using it. For the latest PaperArtsy Challenge we use Kraft card as the base.
The PaperArtsy challenge blog for Topic 7 : Kraft Card has many inspirational ideas for using Kraft card.
I wanted to use a stencil for texture on my card and I was thinking leaves. I really like black and white on Kraft but to add some colour to the composition I decided to experiment with texture paste mixed with paint. Then I tried texture paste with infusions (Emerald Isle) and really liked the result.
Here are the experiments:
On the left is the texture paste applied through a stencil, sprinkled with infusions and a quick spritz of water. I really like that effect. The middle panel is a mop-up of the texture paste left of the stencil mixed with the infusions. The panel on the right is mermaid Fresco paint mixed with texture paste and applied to the stencil.
I stamped some leaves on Kraft card and cut them out. After arranging them on the panels I ended up with two cards. I think I know which one I like best.
PaperArtsy Stencil PS090 by Sara Naumann
Leaves and Wish sentiment from PaperArtsy ELB29 by Lin Brown
Quote on the second card from PaperArtsy EAB04 by Alison Bomber
Kraft card as a base material works for me for CAS cards so I prefer the Wish card with the bright mermaid texture paste but I am pleased with the effect of the infusions so will use that again maybe with a mixed media project.
Looking forward to seeing what everyone else has done for this challenge. x
Sunday, 8 April 2018
Bunting and Banners
The topic this fortnight for the 2018 PaperArtsy Topic 6 is Bunting and Banners.
I was in the mood for a bit of collage and paper cutting so I have made this card.
Stamps used for this project :
PA Eclectica ELB14 by Lin Brown
It was nice to get that set out again, I've always liked that one.
Lots of stamping of windows, doors, bricks and bunting on some paper from my stash by Studio Light. Then lots of cutting out and re-assembling the house. It took hours, I spent ages fiddling with those tiny pieces until I was happy. This is a great way to use up all those pieces of paper you keep because you like them or those paper pads you bought and stored away and forgot about.
Tim Holtz Birch and Pine CMS280 stamp was used for the background, stamped on white card with Vintage Photo distress oxide ink.
I die cut the letters for "HOME" and added them to my banners and used a Tim Holtz paper punch for the folded circles on the bunting (a scrap of TH paper that I couldn't bear to throw away was just enough for these and they matched).
The panel was then mounted on Kraft card.
As it was a home themed card I felt I should photograph it in my home and guess what, it matches my new vertical blinds, this pleases me a lot.
Bye x
I was in the mood for a bit of collage and paper cutting so I have made this card.
Stamps used for this project :
PA Eclectica ELB14 by Lin Brown
It was nice to get that set out again, I've always liked that one.
Lots of stamping of windows, doors, bricks and bunting on some paper from my stash by Studio Light. Then lots of cutting out and re-assembling the house. It took hours, I spent ages fiddling with those tiny pieces until I was happy. This is a great way to use up all those pieces of paper you keep because you like them or those paper pads you bought and stored away and forgot about.
Tim Holtz Birch and Pine CMS280 stamp was used for the background, stamped on white card with Vintage Photo distress oxide ink.
I die cut the letters for "HOME" and added them to my banners and used a Tim Holtz paper punch for the folded circles on the bunting (a scrap of TH paper that I couldn't bear to throw away was just enough for these and they matched).
The panel was then mounted on Kraft card.
As it was a home themed card I felt I should photograph it in my home and guess what, it matches my new vertical blinds, this pleases me a lot.
Bye x
Monday, 2 April 2018
I'm a flip-flop kind of girl
I am sharing a little tag today that I made with my new Tim Holtz side order dies and mini embossing folder. The idea is based on what I saw in one of Tim's YouTube videos.
I really like these little sets but the dies are tiny, very tiny. Fortunately I have tiny fingers and love miniature things so this worked for me.
Here is my tag :
I really like these little sets but the dies are tiny, very tiny. Fortunately I have tiny fingers and love miniature things so this worked for me.
Here is my tag :
Have a great week everybody x
Subscribe to:
Posts (Atom)