Showing posts with label Tim Holtz Distress Markers. Show all posts

Monday, 29 May 2017

Illustrated Garden

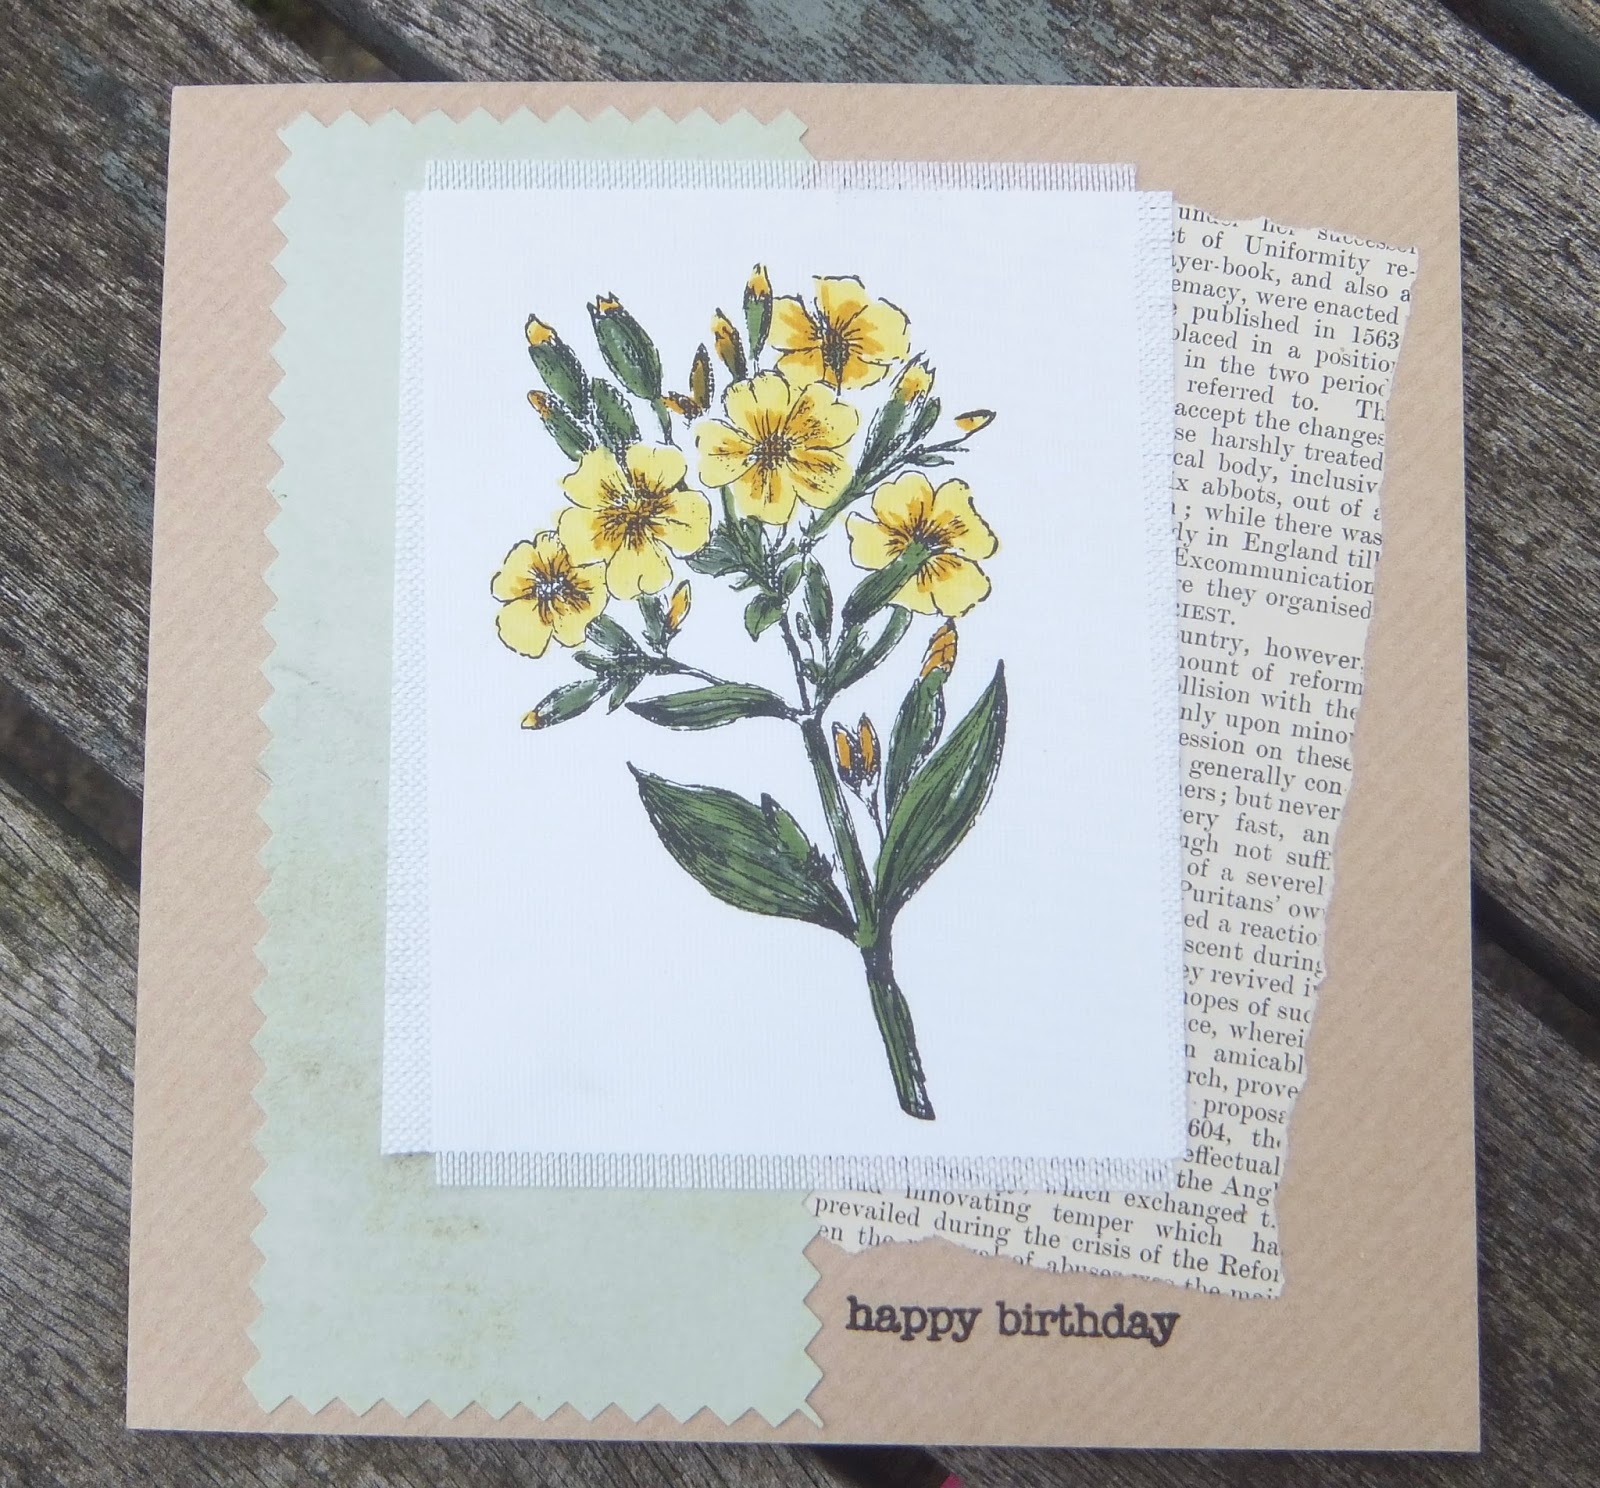
Today I would like to share a couple of cards I have made using the Tim Holtz Illustrated Garden stamp set by Stampers Anonymous.
For some time now I have wanted to try stamping on fabric and I thought the lovely vintage flower stamps would be perfect for this. The images are  stamped with black archival ink and coloured with TH distress markers on fine linen. I am quite pleased with the results.


The panels are mounted on paper cut with pinking shears and some torn book pages. 

Have a great week everybody and thank you for visiting.


Sunday, 1 January 2017

Alpha/Dictionary Challenge 2016 : P

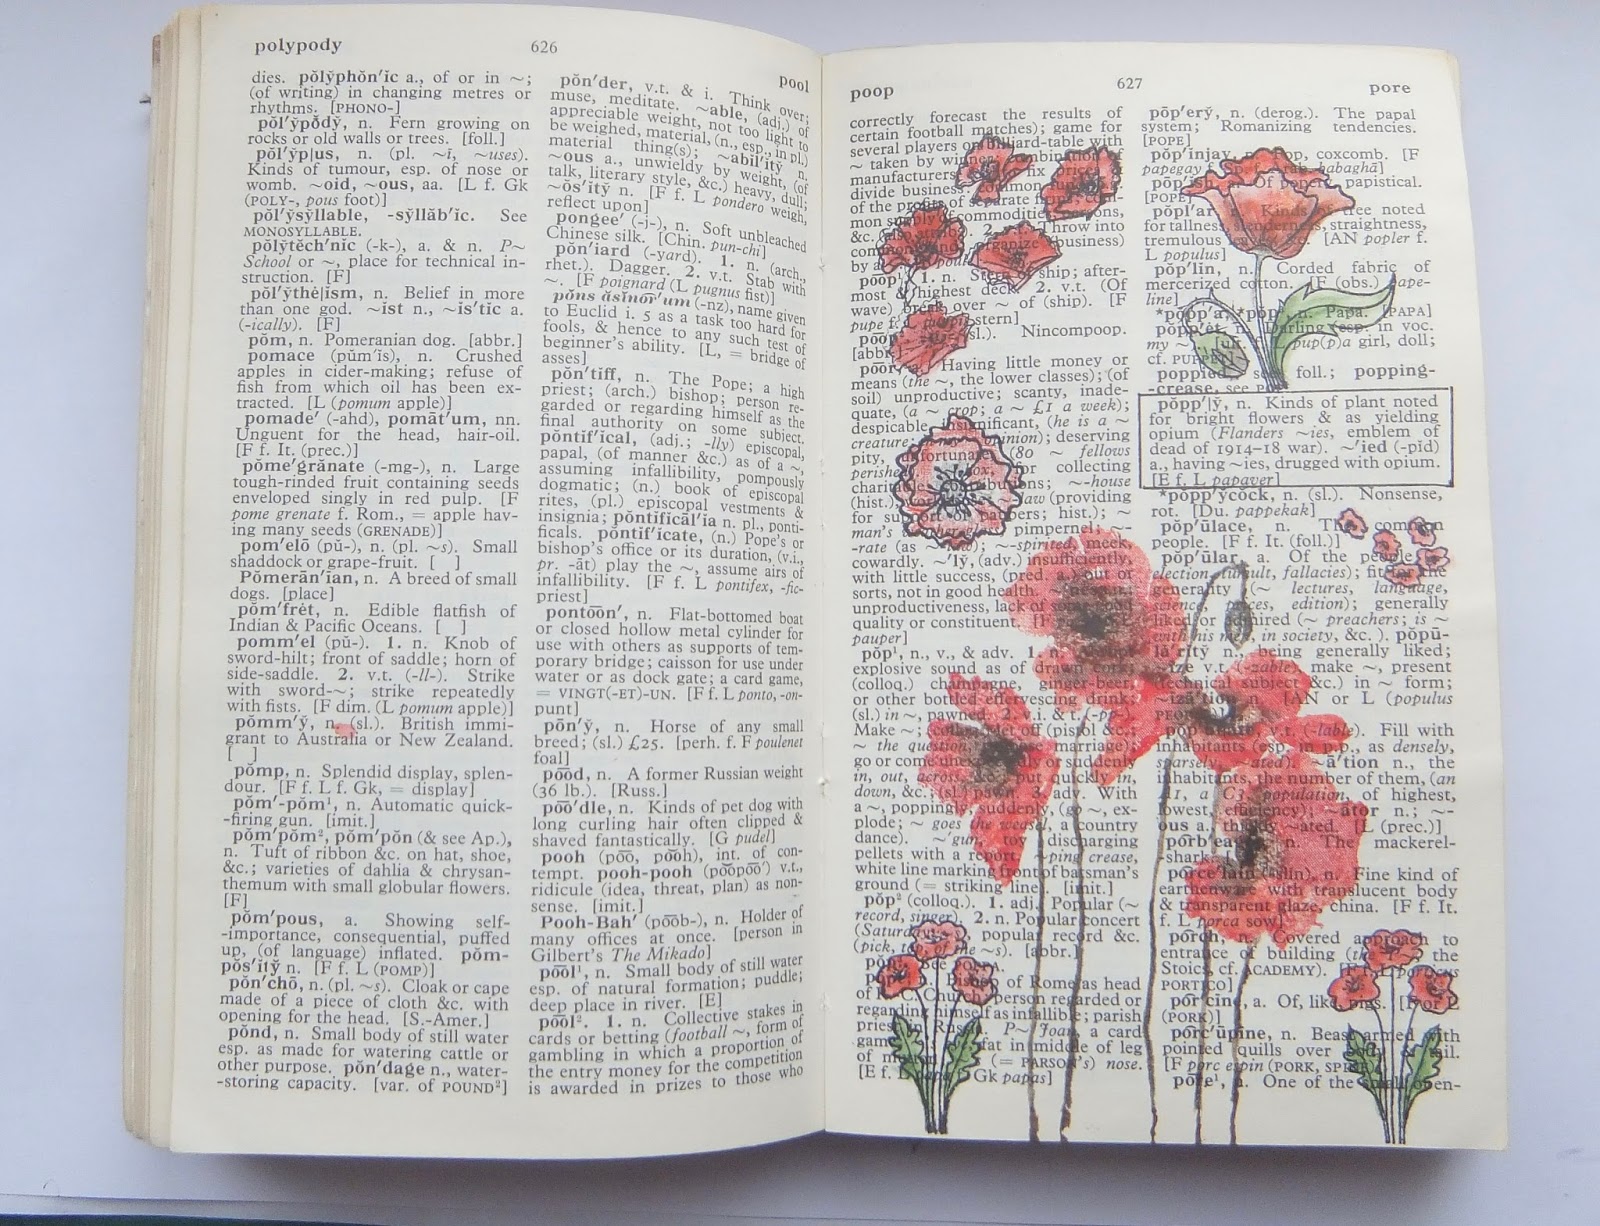
My first post of 2017 is the final page for the Craft Barn Alpha/Dictionary project and the letter is P. I chose poppy and just used lots of poppy stamps all over the page, I guess it sort of works. I was thinking of choosing page as my word, highlighting the word and leaving the page blank but that would be a bit of a cheat wouldn't it!


Recipe:
Rubbernecker Red Poppy Stamp coloured with TH distress markers (candied apple, abandoned coral, ground espresso and black soot) and stamped directly onto the page.
A selection of poppy stamps from Hobby Art CS044D Poppy Scene-it set stamped with black archival ink and coloured with inktense pencils.

I have really enjoyed this project and am proud of myself for completing it. My thanks to all of you who have left comments, it means a lot. Thanks also to Jane and Mickie at the Craft Barn for running the challenge for us and I wish you all a very Happy 2017. x


Sunday, 19 June 2016

Alpha/Dictionary Challenge 2016 : K

I had loads of ideas for the letter K but opted for Kimono. I have to admit that this was mainly because the position of the word on my dictionary page was in the right place and the definition not too long and wordy.

This is my entry for the Craft Barn Alpha/Dictionary challenge : K -


All images are from an old set of wooden stamps called Japanese by All Night Media and coloured with distress markers. The geisha was stamped on tissue paper and stuck to the page with matt Mod Podge (magic stuff, love it).

Enjoy what's left of your Sundays and thank you so much to all of you who comment on my dictionary pages, I really do appreciate it. x


Sunday, 12 June 2016

Stars

The theme for the Craft Barn two weekly challenge is stars. All I could think of was stencilled stars as a background, that was what I wanted to do and I really have no idea what came into my head but I ended up with this card.


I stamped the focal image (JOFY JM30) and masked it out then add the stars with a Tim Holtz star stencil using Abandoned Coral TH Distress ink trying to fade the stars out in the middle around the pile of gifts. The edges are highlighted with Black Soot distress ink and to finish off the background I doodled around some of the stars. The gifts are coloured with distress pens.

I am not very happy with it, I think it is missing something but am not sure what. Maybe it should have a sentiment? Maybe it would have been better as a star background with a quote or sentiment as the focal image. I'll post it anyway, I have run out of steam with this one.

Sunday, 15 May 2016

A Little Sunshine

I have been playing with PaperArtsy Infusions, just a little play because the weather is good and I need to be outside. These lovely little pots have great names and I chose Golden Sands and Violet Storms for this project because they match the changeable weather in May.
The Two Weekly Challenge at the Craft Barn is "Sun" so this is my entry.


Stamps used : PaperArtsy Lynne Perrella LP033
I stamped and embossed the images in black, painted water onto the sun and sprinkled it with infusions then spritzed it with water. I find that works best on ordinary stamping card. Then added the violet storms around the rest of the panel to make it dark and stormy. The images are coloured with distress pens. I added some Tim Holtz Chit Chat words and scruffed up the edges of the card with a sanding tool and mounted it on some purple card.

I hope you have all been enjoying your weekends and I wish you lots of sunshine next week.

Tuesday, 1 March 2016

Alpha/Dictionary Challenge 2016 : L

The next letter in the Craft Barn Alpha/Dictionary challenge is L. Lots of ideas but sometimes, the dictionary definition just doesn't fall in the right place on the page does it! So, I chose 'LEAF' for my word. Mainly because I love using leaves anyway and because I had an idea that I could make the pages look a bit like leaves that had been pressed in the pages of a book. What do you think? Did it work?


I started with a coat of white gesso on the pages leaving the definition visible. Then using my PaperArtsy stencil by Lin Brown (PS002) I applied Toad Hall Fresco Finish paint through parts of the stencil with a sponge. When dry, the leaves are outlined with a Ground Espresso distress marker.
The stamped images under the definition are from a Paperartsy Hot Picks set : 1102EZ, distress markers scribbled onto the stamp and applied to the page.
I wanted a border on the page so stamped some tiny leaves in ground espresso distress (messy, the leaf stamp was an acrylic stamp and doesn't work so well on the gesso as rubber stamps - learned that lesson!).
Then I added some die cut TH tattered leaves that I had left over from other projects.
At this point I was tempted to add more leaves but I decided to leave it alone.

That's it, my entry for the challenge done.

Sunday, 14 February 2016

Alpha/Dictionary Challenge 2016 : F

The word I chose for this fortnight's Craft Barn Dictionary challenge using the letter F, is Fashion.
This is a messy one but thanks to all who suggested sticking the pages of the book together, much easier.


Stamps used : Tim Holtz Runway
I started by attempting to brayer distress ink on the pages for the background and stamped some random bubble wrap in purple archival ink but I did not like the look of it so knocked it back with some chalk Fresco Finish acrylic paint. Images of the runway models are stamped in black versafine ink and coloured with distress markers.
I added the heart and border with a black pen.

This is my entry for the challenge,  a bit rushed as I had so little time this weekend but I'm glad it is finished.


Saturday, 23 January 2016

Hat Crazy

This is my entry for the Craft Barn Weekly challenge. The theme this week is "Hats".


Stamps used :
Tim Holtz Flower Garden CMS215
Tim Holtz Bird Crazy CMS212

All images are coloured with distress markers. The flowers and stalks are stamped onto white stamping card, cut out and mounted on the background. The bird is stamped on watercolour card. All mounted on a 7 x 5 Kraft card.

I was planning on doing a series of ATCs for this "hat" challenge but I had seen a similar idea from one of the TH design team and wanted to give it a try. Don't those flowers make great hats!

Happy Saturday everyone.

Saturday, 25 July 2015

Christmas in July

I caved in and bought those adorable Tim Holtz Bird Crazy stamps and now I see there is a set of crazy accessories too. I have them on pre-order from Oyster Stamps. They are due mid August but I can't wait for them so I made a Christmas hat for my little bird from last year's half tone set.


I used watercolour card stock and distress markers to colour her. Fun flock is added to the hat and ground for snow.

This got me in the mood so I played with my Tim Holtz  Sizzix Alterations set called Merry Christmas that I picked up in the sales earlier this year. This one is almost a copy of the example on the back of the packet and I think a good one to make a bunch of quick cards for Christmas.


I used distress markers direct to the stamp, die cut and mounted with foam pads.
Colours used were Barn Door, Frayed Burlap and Wild Honey. I still love the names of the TH colours.

Happy July 25th!

Wednesday, 13 May 2015

Watercolour Effects

A quick post showing two cards I have made using Rubbernecker stamps.


Fall Tree


2 Daisies

These are so ridiculously easy to make. Just colour the stamps with distress markers, spritz with water and stamp them onto watercolour card. I added a bit of detail to both with the fine point of the pens then mounted them on cards.


Sunday, 10 May 2015

Distress Markers meet Alcohol Pens

The sun is shining, Spring is here and it is still light after 8pm. I do love this time of year.
This weekend I have been having a go at the technique I learned from Kay Carley last weekend.
Have a look at Kay's beautiful work on her blog:
http://kaycarley.blogspot.co.uk/2015/05/may-class-at-glitter-pot.html

I cannot claim the colour schemes used on the flowers as my own as they are the same as Kay used on the example I saw in the demo but I shall play with this again using different colour schemes.
My first card uses the new Penny Black Demure stamp and for the second I used a Lin Brown flower for one of my PaperArtsy sets. The sentiments and sprigs are from Hobby Art sets.


The flowers are coloured using Copics and the background stamping and watercolour effect is achieved with distress markers. 

Enjoy what is left of the weekend,
Julia x

P.S. Note to self ..... I must do blog updates more than once a month!


Sunday, 12 April 2015

Free Stamps

We spend all this money on craft products and just once in a while, free stamps come your way that just work so well together. My friend gave me the Stampendous cling stamp called Parasol Portrait as it was just not her thing and she thought I would like it, I do, I really like it.
The free stamp that came with Craft Stamper magazine this month is by Visible Image and is a grunge flourish which I thought would work perfectly with the portrait.


The background is distress ink : Weathered Wood, Victorian Velvet and a touch of Milled Lavender.
Stamped the flourish part of the freebee stamp in sky blue memento around the edges of the A6 shiny card to get a pale and interesting background.
Then I added the image in black stazon and stamped the grungy part of the stamp around the edges. I like the graphic look of it stamped in black. The sentiment and rose text was added later and the roses coloured with distress markers.

That's all for today, the Sunny day sent me outdoors so minimal crafting has been done.

Saturday, 28 February 2015

12 Tags of 2015 : February

Last day of February and I have managed to finish my TH tag just in time.
I am not planning on writing details as the step by step tutorial is on Tim's website :
http://timholtz.com/12-tags-of-2015-february/

I really had to do this tag as I already had most of the ingredients. I improvised with the heart as the idea of using the sewing machine that has lived in the cupboard for years is a step too far for me. I loved doing the collage part of this tag and especially like the shadow effect using the black soot distress pen and smudging it around the collage parts. I have added a close-up of that.


Good fun to do this tag and I managed the deadine too!

Saturday, 12 July 2014

A Postcard from Abroad

The Artful Times challenge 59 is A Postcard From Abroad.
I love mail art and had so many ideas for which country I would choose but in the end I choose Holland as it is less obvious and Dutch things are really so nostalgic for me. I had an Aunt who was married to a Dutchman. She spent 6 months of her year in Holland and 6 months in Cornwall and when she came back, she always brought gifts. I wonder how many little Dutch windmills are in people's houses in Cornwall due to my Aunt's gifting. I also had the misfortune of owning a pair of clogs, mine were red, the real wooden type - very uncomfortable.

Here is my entry for the challenge, my postcard from Holland.
The focal image is a windmill stamp called Delft Style Windmills from Katy Sue Designs stamped in Denim Adirondack dye ink and colour tinted with salty ocean distress marker. Salty ocean distress ink applied with a duster brush. The postcard stamp is a Tim Holtz one.


When I think of Holland I think of the blue and white of the Delft china and, of course, orange. I wanted to add some tulips to my postcard but have no tulip stamp but .... I remembered a Mariane Designs embossing and cutting folder that I have which has tiny tulips. The tulips are the waste from that cut and emboss folder, they took an age to pick out of the die and were devils to pick up, so tiny. The stamp is from a sheet of vintage images from my stash and the flowers were made using a Martha Stewart punch  with tiny orange gems in the middle.
Phew .... my postcard is done, and I loved doing this challenge.

Tuesday, 9 July 2013

Music and Lyrics

#3 Music and Lyrics is the theme for the Twinchies challenge this month. Many possibilities, my first thought was to do something with a reggae theme with rainbows and bright colours as its summer but I went for the obvious as I love this little bird stamp from Crafty Individuals. I've used it many times over the years so here it is again:


The background is some music vellum from my stash. I stamped the bird image on the vellum and also on to white card and coloured it with distress markers, peeled paint and tumbled glass. Cut out the frame and the bird and pop them on with pinflair glue.

Crafty Individuals stamp CI-184

I will enter this one in the challenge but may well have a go at another one before the month is out.

Saturday, 6 July 2013

In an English Country Garden

Well Summer came and I took off to have a look around Nyman's Garden this morning hoping for some inspiration for the Twinchie Challenge #6 : In an English Country Garden. There was plenty of inspiration, so much in fact that I stuck with my original idea but added a second one inspired by this pot .... so English.


These are my twinchies. The top one inspired by the pot has a chalk background in green and blue, the hanging leaves are stamped using peeled paint distress marker, the pot stamped and masked out then the trowel and flowers added. The images are from a Lindsay Mason Design stamp set called Watering Can Scene. The pot is coloured with promarker, the flowers stamped with blue archival ink and liquid pearls added to the centres of the flowers.


The twinchie below uses an image from a Craft Stamper magazine freebie, a really old one but I was really good last weekend and organised all my old free magazine stamps into one box so I can see what I've got. I quite like these blackberries so thought they would make a good focal point for the twinchie. The background is antique linen and mulled lavender distress ink, very pale but gives it that aged look with a hint of colour. I stamped the blackberries twice, coloured them with promarkers and cut them out and stuck them on with pinflair glue. The butterflies and strawberries are elements from a Lili of the Valley stamp, they are tiny, I thought I'd leave them uncoloured to look a bit sketchy. I prefer the second one.

I hope you are enjoying the weather. Don't stay out in that sun too long! 


Thursday, 20 June 2013

Loves Me, Loves me Not

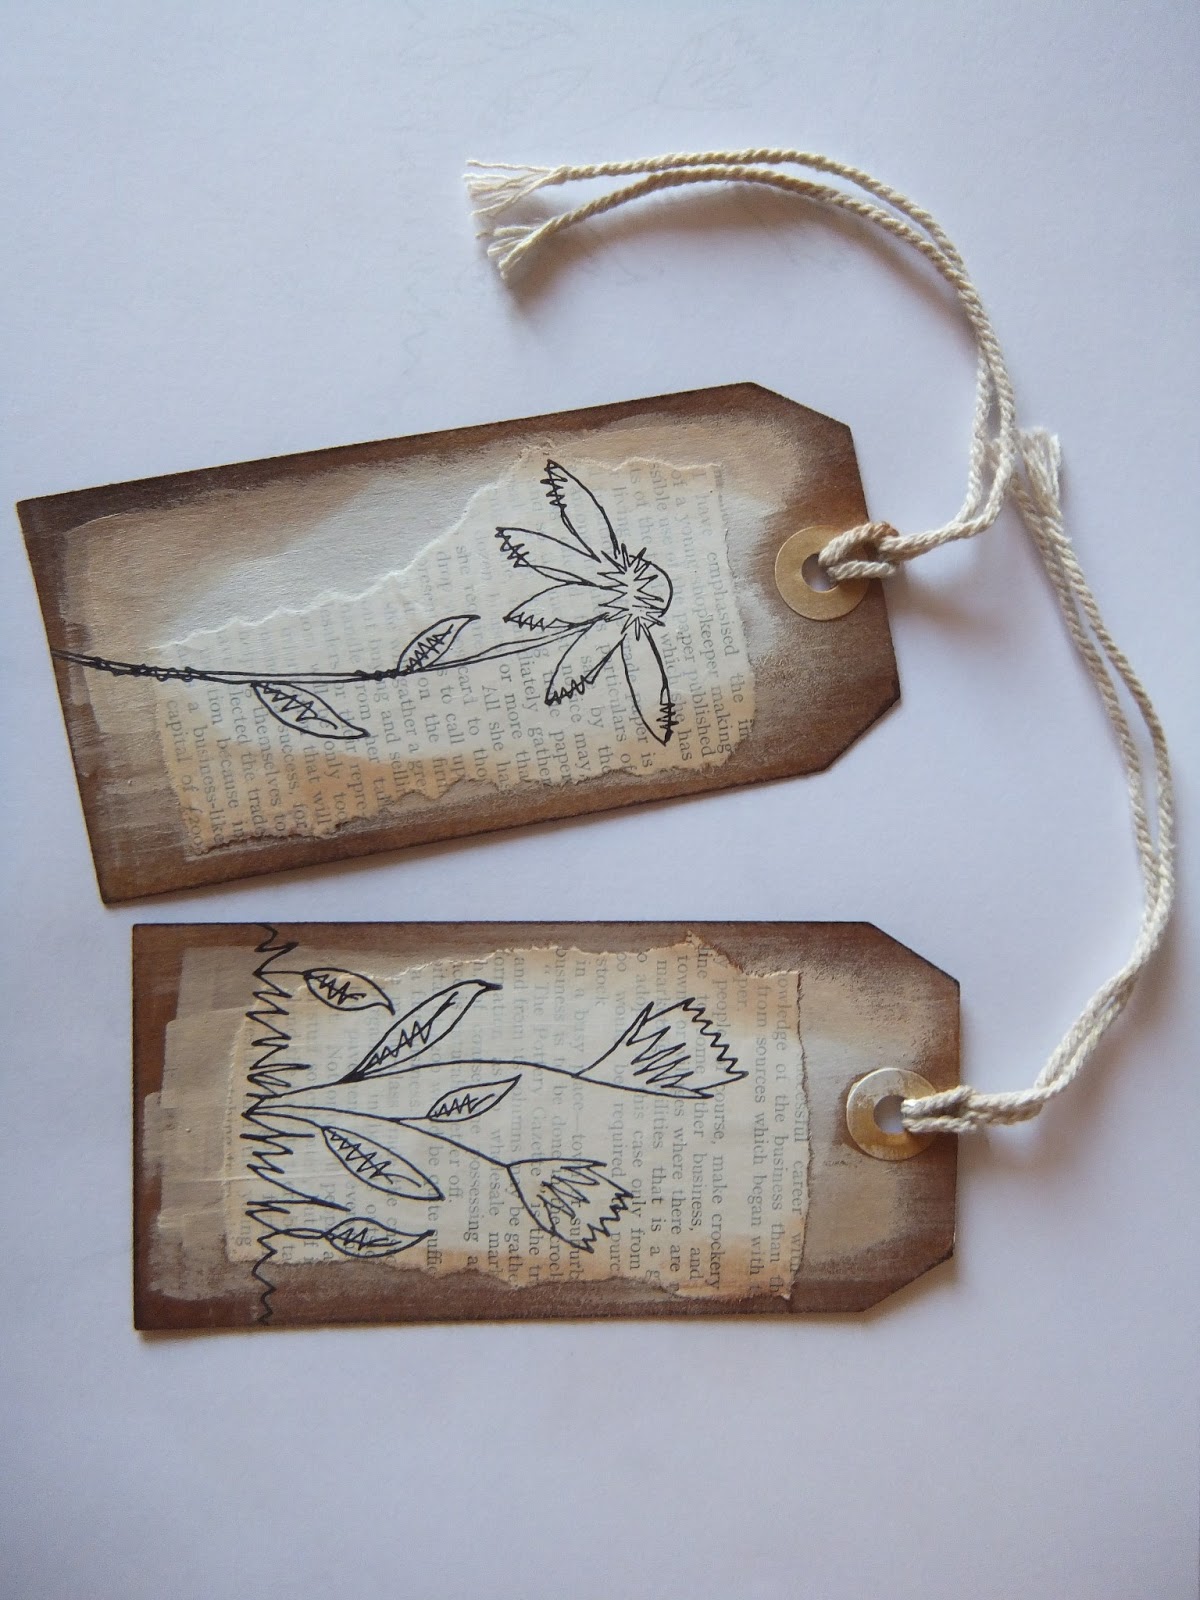
Inspired by Alison's lovely vintage tag project mentioned in my last post, here is  my Kraft tag, book pages and gesso project.


Two Kraft tags, stick on some pieces of torn book pages and paint roughly with gesso. The edges of the tags are distressed with vintage photo distress ink.


The daisies are from JOFY13 and stamped on the tag using black archival ink. The photo is rotated and I don't know why.


Colour the daisies with distress markers. I used mustard seed, wild honey, spiced marmalade and brushed corduroy. Tags complete. 


So, having made the tags, I had some of the book page left. To use it up I made the card using the same technique but on white cardstock and mounted on Kraft paper. This works better on Kraft card than on the white cardstock but I am pleased with the result. Love those JOFY daises, I think they are my current favourites.


Sunday, 16 June 2013

Antique Songbird

Another project completed this morning, this time it is a card. I used the IndigoBlu Antique Songbird stamp, stamped it on white cardstock with Galaxy Gold, Elderberry and summer sky dew drops and heat embossed with clear embossing powder. It was hard to see the blue on the stamp so there is only a tiny bit of blue but I rather like the effect. The image was then coloured with Antique Linen distress marker and  mounted on purple card. I quite liked it at that point but there was something missing so I added the silk flowers joined together with a white brad and stuck on with Pinflair glue.


I hope you are enjoying what's left of Sunday and if you get a minute, go check out Alison Bomber's blog, Words and Pictures where she has posted a particularly amazing vintage tag project and in celebration of her one year blog anniversary she has Blogaversary Candy to give away if you leave a comment. Good luck!

Sunday, 26 May 2013

Watercolour Paper

The free stamp on the Craft Stamper magazine this month is a JOFY design from PaperArtsy and its a lovely one. I tried it out stamping on watercolour paper and then used distress markers to colour it, nice result on the watercolour paper.
I am entering this one in the new Twinchie blog challenge where the theme is "Free for All" although Zoe from the design team already used the same image, mine uses the technique from the magazine and I wanted to try using the distress on watercolour paper.  I really love this little stamp and I can see I am going to use it a lot. 

What a lovely bank holiday weekend its been so far, what a difference a bit of sunshine makes. Hope you are enjoying your Sunday wherever you are. 

Thursday, 11 April 2013

Spring

I should really be going to bed but I am wide awake so I have decided to post my entry for this month's Show us your Twinchies challenge 4 entitled Spring.


For the background I used a black fine micron pen to draw the faux stitching grid and coloured the grid lines with a promarker. It sort of reminds me of floral duvet covers. The tiny flowers are from an element on a WOW set, stamped using worn lipstick distress marker. The bird is from a Polka Doodles set that was free with a magazine, I've used this little bird lots of times, isn't he sweet. He is stamped onto white cardstock and the body cut out, coloured with Promarkers and raised on foam pads. 

Lets hope the weather warms up a bit at the weekend and we can all get out and about and enjoy the Spring.