Showing posts with label Tim Holtz Distress Oxide. Show all posts

Sunday, 2 December 2018

Festive Overlays

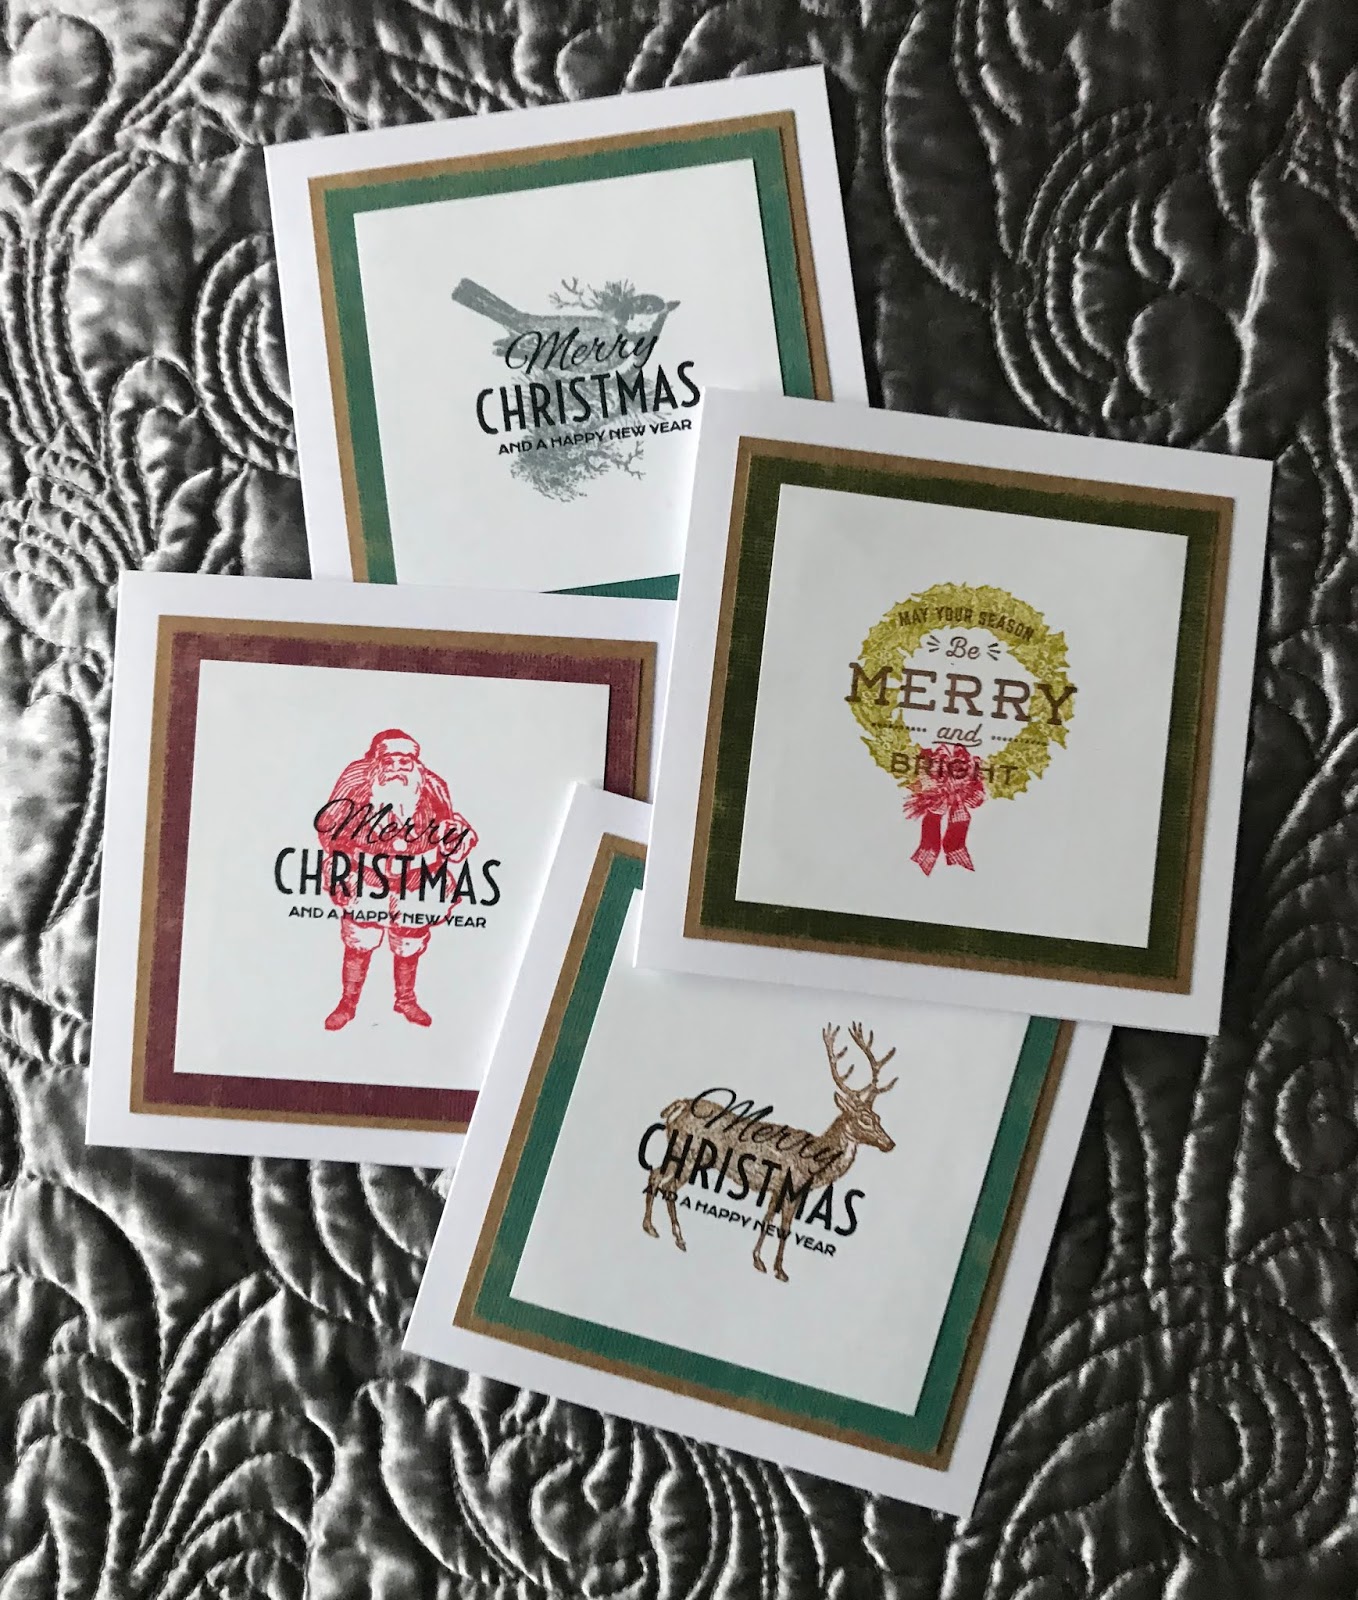
More Christmas cards have been made in super quick time thanks to Tim Holtz 2018 Holiday Hacks YouTube video inspiration. Here is the video if you have not seen it :
https://www.youtube.com/watch?v=K6UI-lKvOl4

My cards, all stamped with Distress ink (not oxides);


I've also used the same stamps for some other designs which are my own, here is one example;


The small holly branch makes a nice background but the interesting thing with this one was the blue that comes out in the stamping when you use frayed burlap distress oxide. I think my stamp was slightly damp when I stamped with it as it had been cleaned previously with a baby wipe.

This is a great set, probably my favourite of the 2018 TH Christmas release.

The Country View Challenge theme for December is Christmas so I would like to enter my stag Christmas card in that challenge.


Sunday, 28 January 2018

Under the Sea Take Two

Continuing with the underwater theme from last week, my new PaperArtsy Scrapcosy stamps arrived in the week. Here are the results of today's experiments.


All stamped images are from PaperArtsy Eclectica by Scrapcosy ESC10.
The background is made using Distress Oxides and images stamped with watering can archival ink.
The fish have been stamped with Faded Jeans Distress Oxide ink, painted with white fire Fresco paint and cut out. There is some oxide ink in the mix on the darker fish which was stamped with archival ink.
The white fire paint makes them look shimmery, here's a close up;


Carrying on with the fish because they are great fun to work with, I made a couple of little cards.
They are small 4" by 4" cards. The images are stamped with black versafine ink this time with glossy accents on their eyes. 


Finally, an experiment with a watercolour effect. These fish were second generation stamping spritzed with water (faded jeans distress oxide again). I cut it down to ATC size.


Go see Raquel's beautiful examples and inspiration on the PaperArtsy blog for this release, I loved playing with these fish.
http://blog.paperartsy.co.uk/2018/01/new-paperartsy-products-scrapcosy-jan.html

Monday, 16 October 2017

Stamping with Water

I am still playing with Distress Oxides, I don't think I will ever tire of experimenting with them.
Here are some experiments using water with stamps and stencils.


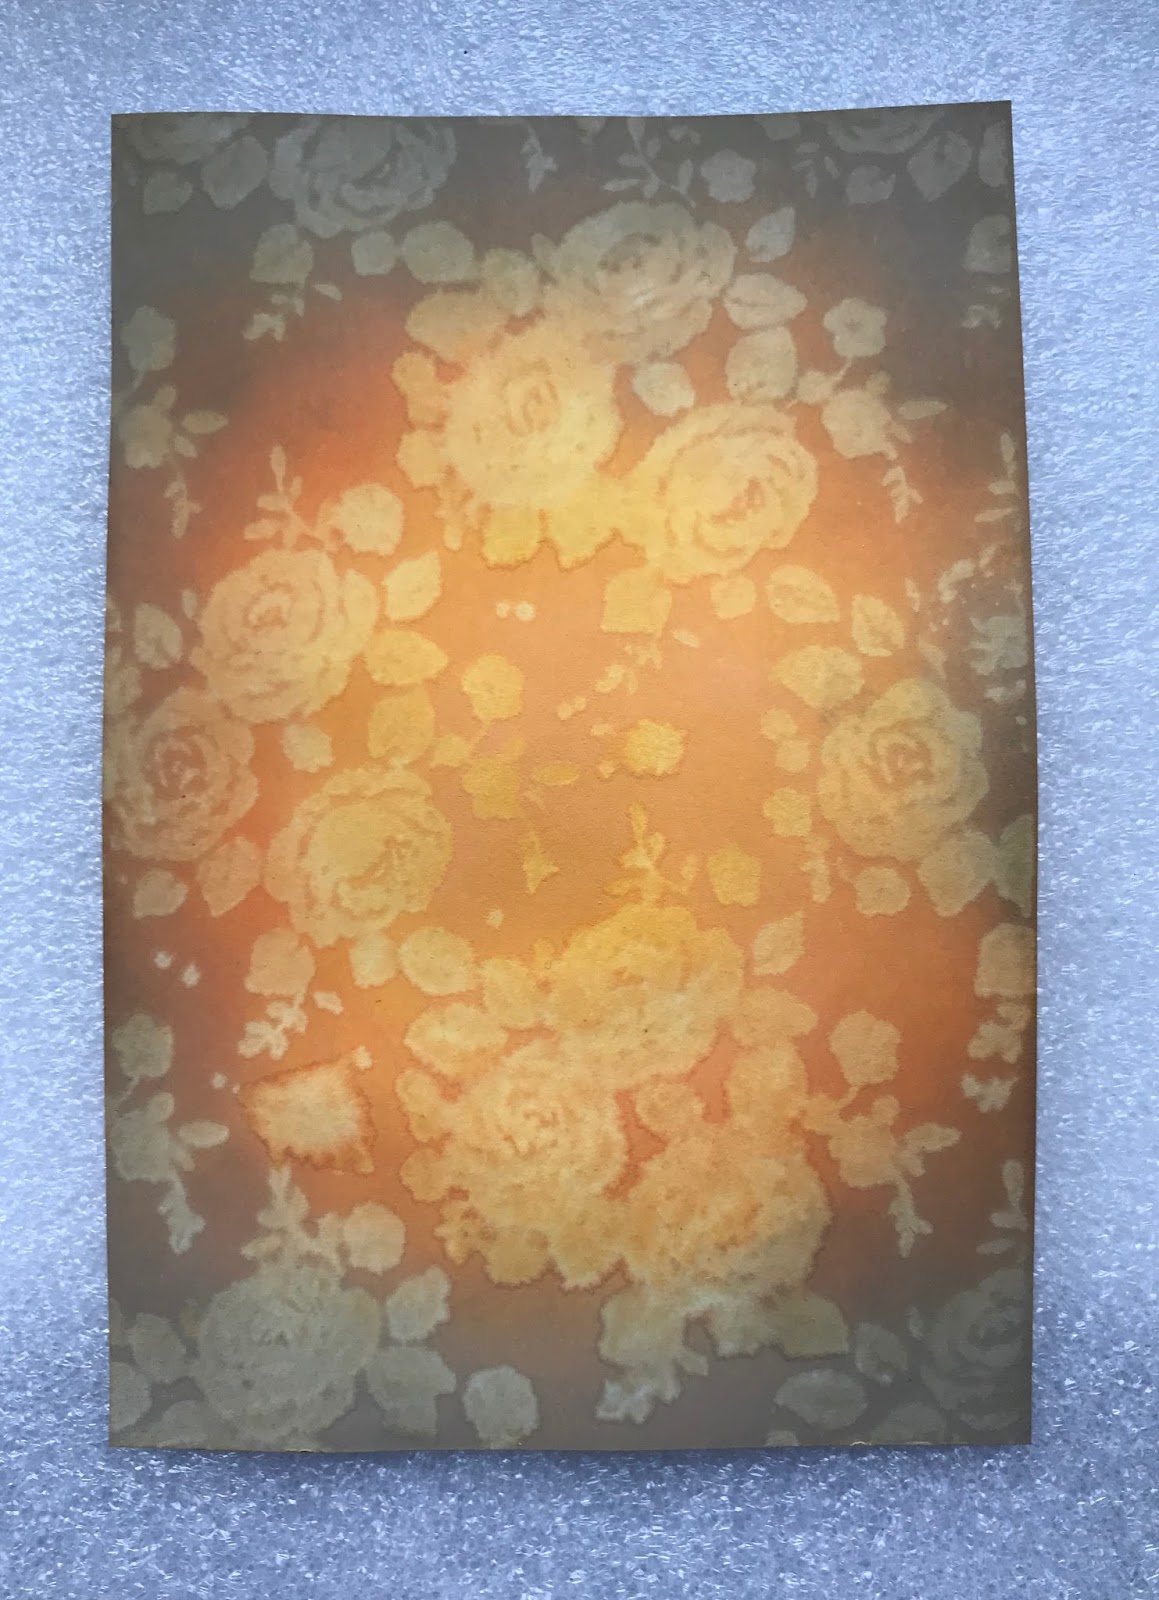
Background : Distress Oxides applied with a foam applicator - wild honey, spiced marmalade and frayed burlap. Starting in the middle of the card panel with the lightest colour and blending out to the frayed burlap at the edges. Then with a background stamp, I used a Tim Holtz floral background stamp, spritz the stamp with water and stamp it on the card. The water reacts with the oxide ink and removes some of the colour.
I like this one, it looks like vintage wallpaper.


The same idea with this one but this time I used a stencil (Tim Holtz : Shattered). Spritz the stencil with water and stamp with it, hold it in place for about a minute with a piece of kitchen roll on top of it to soak up any water that seeps out. 
This one looks like a spiders web. 

I used the background to make an Autumn panel. 
Stamps used : PaperArtsy ESC05 by Scrapcosy and PaperArtsy ELB29 by Lin Brown.


Stamping with water is easy and lots of fun. Don't use too much water, just enough to make the stamp or stencil wet but not dripping. 

Bye x


Sunday, 15 October 2017

Craft Barn Twelve Month Challenge : October

Here we go, my October entry for the Craft Barn Twelve Month Challenge.

The verse for October is :

Fresh October brings the pheasant
Then to gather nuts is pleasant

I thought pheasants ought to feature in this one and I wanted to use my Scrapcosy acorn branch stamp for the "nut" element. Here is the mini page I came up with for October;


The background card is from my stash, coloured with distress oxides (wild honey, spiced marmalade and vintage photo). There is a bit of water spritzing there, just a little.
I stamped the branch in potting soil archval ink and coloured it with inktense pencils, they work on top of distress oxides which is new thing I tried today. Acorns are shiny so there is some glossy accents on that acorn, it doesn't show that well in the photo but it is there.
I printed off a couple of pheasants from the internet, cut them out and added them. They were tiny so the cutting was a challenge! 

Autumn is so inspiring for arty crafty projects. 
I'm off to see what others have done for the challenge now. 
Catch you later and thanks for visiting.

Sunday, 13 August 2017

Autumn Tag

A busy weekend with house jobs but I still found the time to have a play. I have a couple of the new Distress Oxides: antique linen, frayed burlap and wild honey so I used then to make an Autumn tag.
Of course I got carried away and threw in some infusions as well.


Stamps: PaperArtsy Eclectica by Scrapcosy ESC05
Paperartsy Infusions : Rusty Car, Olive Tree and Orange County
Distress Oxides : antique linen, frayed burlap and wild honey

The images in the background and the mushroom are stamped with coffee archival ink. The branch is stamped with frayed burlap oxide and painted with antique linen. The mushroom was stamped on kraft card and painted with infusions and matte glaze, I quite like the effect on kraft card.

Hope your weekends were good ones.

Sunday, 9 July 2017

Craft Barn Twelve Month Challenge : July

The July verse for the Craft Barn Twelve Month Challenge is :

Hot July brings cooling showers,
Apricots and gillyflowers.

We have to include a gillyflower so I googled gillyflower just to be sure. A gillyflower is a medieval term for any fragrant summer flower but typically refers to dianthus or carnation. So I used my Tim Holtz sketchy flowers for this page, I think they are carnations.


I started with distress ink on the background, mainly blues but with some cracked pistachio thrown into the mix. Then some stamping and masking of the flower heads in the background, I wanted to leave them sketchy and add one flower head as a focal image coloured apricot. I used Promarkers to colour that one, cut it out and stuck it on the page. 
I wasn't too happy with the background as I wanted it to look summery but as if it had been raining or was about to rain. I added some distress oxides in faded jeans and broken china plus water spritzing and tried to drip it a bit from the top of the page. It doesn't show that well in the photo but there are some very fine drips. OK, happy with that now. Oxides are just so good!

Monday, 26 June 2017

New PaperArtsy Stamps

I am loving the new PaperArtsy releases and I predict they are going to be costing me a fortune. My first purchase was Kay Carley's beautiful foxglove set EKC08 and the new stencil PS061.
Check out the PaperArtsy blog post, Kay's example's are stunning :
http://blog.paperartsy.co.uk/2017/06/new-paperartsy-products-eclectica-kay.html


Inspired by Kay's work I had a play and made up a couple of little cards. Here is one of them.


The background was an experiment with infusions which went a bit wrong so I used Chalk Fresco Finish paint on top of it, I quite like that effect.
I used Distress oxides Faded Jeans and Wilted Violet for the stencilling then stamped the smaller of the two foxgloves from the set in black. I added some of the other flowers in black and cornflower blue archival ink and coloured them with distress oxides. One of the bees is cut out and mounted on a foam pad so he stands off the foxglove.

That was fun, I know I will use the stamps and the stencil a lot.
Thanks to Kay and to PaperArtsy for another great release!

Saturday, 20 May 2017

Simply Wild

Today I would like to share a little card I made using my Visible Image "Stay Wild" stamp.
This one was super easy. The background is made with distress oxides on white stamping card spritzed with a little bit of water. The horse image is stamped with black Versafine ink. That's it, very simple.


Enjoy your weekends everybody.

Saturday, 25 February 2017

Distress Experiments

Oh my goodness, I love the new Tim Holtz Distress Oxides.
I was relatively restrained and only ordered three colours, just in case I wasn't impressed. Well, that wasn't going to happen was it!
They arrived last week so this afternoon I had a little play. There is no finished project here, I just wanted to share some of my experiments with you.

The three colours I have are Vintage Photo, Iced Spruce and Spiced Marmalade. All the trials are on white stamping card.

First up, here are two panels showing the difference between Distress ink on the left and Distress oxide on the right. The oxides are muted colours when you add water, the inks are more vibrant. The finish is matt, just as advertised.


This is a link to a video of Tim's demo at Creativation by ScrapTimeVideos :
https://www.youtube.com/watch?v=3p92g4Kfnbw

The second panel originally had a bit of iced spruce ink mopped up from a previous project and I added the oxides on top. The oxides are opaque so on top of the ink but there are some little patches of the dye ink showing through.


So, what are they like to stamp with? Here are some comparisons.


See the colour difference between the iced spruce panels, isn't it lovely. The leaves are stamped with the vintage photo, the colour is very similar but spritz water on them and the magic happens. The dye ink separates from the oxide but the image is still there as the pigment is left behind, just not so sharp. Add more water, more separation.

Finally, what does distress ink look like on top of the distress oxide? 


For the tag on the right, I used the three colours as in the first photo. I spread the oxides on the craft mat, spritzed with water, dried with the heat gun, added more, dried again and so on until I was happy with it.  Watch Tim's demo, the technique is exactly the same as using distress ink. 
I used spiced marmalade distress ink through one of the new stencils (Floral THS077). Doesn't that look good. All it needs now is a focal image and maybe some embellishment and I think that would be quite a nice tag. I'll think about that later.
The small tag on the left is just me cleaning up the stencil with a baby wipe, we don't want to waste that ink do we! I'll find some use for that later too.

I highly recommend these oxides, I had great fun this afternoon with my new toys.