Showing posts with label Fresco Finish Paint. Show all posts

Sunday, 20 May 2018

Vintage Neutrals

PaperArtsy challenge Topic 9 : Vintage Neutrals.

A great topic and some fabulous inspiration on the PaperArtsy blog. For my project I decided on a tag and my inspiration was Alison Bomber's beautiful tag which you can see under the above link.
My tag is nothing like Alison's apart from using Tim Holtz paper dolls for the focal image. I have used one of Alison's lovely quotes from the Dreaming and Doing set (Eclectica EAB07).


I started with a painted background with Chutney and Tikka Fresco paint which looked too dark so I knocked it back with some watered down gesso. Still too dark so I dry brushed chalk fresco paint on top of that. Then I used a Kay Carley stencil (PS061) to add some leaf fronds. The paint I used was Irish Cream.
I tried a bit of crackle glaze which worked a little but not very well, I will need to practice.

I added some flowers from ESC03 by Scrapcosy stamped with watering can archival ink and stamped the quote on a Tim Holtz die cut wood plank which I had painted with chalk and white fire paint. A couple of brads and a button to finish it off.

The photo looks a bit blue, that's the photography, there is no blue on my tag!

A great topic again and a chance to use some paper dolls. I am quite pleased with this one.


Sunday, 23 July 2017

Playtime

This afternoon I had a play with my Seth Apter bits and pieces. I love the abstract shapes of Seth's dies. Normally, I'm not a fan of die cutting (unless they are Tim Holtz dies of course, who doesn't like those) but the Spellbinder die I have from Seth's range cuts properly and is great fun to play with. Initially I just used a bit of old shiny card from my stash  just to see what the die looked like but ended up using it because it matches the limited edition paints quite well. I think I need to add more of these dies to my wish list!

Here are two cards I made with my panels, one is a card for a friend's 60th birthday in August.


Spellbinder Die : Seth Apter Splatter Proof
Numbers die cut using Sizzix Tim Holtz Boardwalk die 
Stamps : PaperArtsy Eclectica : E3 Seth Apter 04 
Paint : PaperArtsy Fresco Seth Apter Limited Edition : Smoked Paprika, Green Patina, Mud Splat, Key Lime.
Metallic effect card stock from stash.


Monday, 26 June 2017

New PaperArtsy Stamps

I am loving the new PaperArtsy releases and I predict they are going to be costing me a fortune. My first purchase was Kay Carley's beautiful foxglove set EKC08 and the new stencil PS061.
Check out the PaperArtsy blog post, Kay's example's are stunning :
http://blog.paperartsy.co.uk/2017/06/new-paperartsy-products-eclectica-kay.html


Inspired by Kay's work I had a play and made up a couple of little cards. Here is one of them.


The background was an experiment with infusions which went a bit wrong so I used Chalk Fresco Finish paint on top of it, I quite like that effect.
I used Distress oxides Faded Jeans and Wilted Violet for the stencilling then stamped the smaller of the two foxgloves from the set in black. I added some of the other flowers in black and cornflower blue archival ink and coloured them with distress oxides. One of the bees is cut out and mounted on a foam pad so he stands off the foxglove.

That was fun, I know I will use the stamps and the stencil a lot.
Thanks to Kay and to PaperArtsy for another great release!

Monday, 30 January 2017

PaperArtsy Pink and Orange Challenge

Having spent most of January drooling over the spectacular new releases from PaperArtsy and purchasing a couple of the new stamp plates I decided I should get busy and use them.  The inspiration posted by Darcy for Topic #1 : Pink and Orange was fantastic, I could easily have been inspired by several of those ideas. I chose the fabric picture with sequins, the colours reminded me of sari fabrics which are typically hot colours with gold accents.

I have made a small canvas for my entry. My plan was to have pink and orange stripes in the background with sequins dotted around and then use my new Tracy Scott stamp set for the focal image. Here it is.


Fresco Chalk Paints :
Bougainvillea, Smoked Paprika, Pumpkin Soup, Rose, Old Gold.
(ooh - Bougainvillea blends so well with that Smoked Paprika paint, rather pleased with the result on the flower)

Stamps :
Eclectica ETS08 by Tracy Scott.
I painted some white card and then stamped the flower, cut it out and stuck it on the canvas. Same idea for the centre of the flower which was old gold on top of pumpkin soup.

Archival Ink:
Jet Black and Monarch Orange

Finished off with some sequins, gold flake and bit of gold sparkle pen on the stem.

Hope you all have a good week and thank you for visiting. x


Thursday, 15 December 2016

My Christmas Poinsettia Wreath

Here is a quick picture of my Christmas wreath project.


I made this from a kit by Designs by Georgina.
The poinsettia elements are die cut greyboard and I have painted them with Deco Art mixed media acrylic paint and Fresco finish chalk paint. The snowflake stamp is from a JOFY Christmas set and I used burlap tape to cover the ring.

Merry Christmas.

Sunday, 18 September 2016

In the Kitchen

I saw the Craft Barn two weekly challenge theme whilst I was away visiting my Mum and had lots of ideas I wanted to try but having no supplies I had to wait until I returned. The theme is "All Around the House" so I decided on a kitchen themed card.

The background is stamped using a square cut off a kitchen sponge, a technique that gives you a lovely textured effect when used with paint. The background reminded me of kitchen tiles although the colours are deliberately random.


Paints used : 
Paperartsy Fresco Finish chalk paints - Granny Smith, Professor Plum and Captain Peacock.
Stamps by Marianne Designs

I would like to enter this in the Craft Barn challenge for this fortnight. I've not entered this challenge for a while, mainly due to lack of time but this challenge was just so inspiring and I really enjoyed it.
I'm off to take a look at what other people have done now and will be back soon.


Sunday, 4 September 2016

Playtime with Paperartsy

It rained yesterday but rain does not stop play does it. A great excuse to catch up on jobs around the house and take some time out to play in my craft room.
My new set of Lin Brown stamps arrived in the week. As soon as I saw this release I knew I could not resist so purchased ELB30.
They are on the Paperartsy blog here:
http://blog.paperartsy.co.uk/2016/08/new-pa-products-by-lin-brown.html

Inspired by Lin's example, I pretty much copied the style and design to get me into the mood. I wanted the panel to end up on a card so adapted it a bit and left some elements out as my panel was smaller than the grass stamp. It is big and begging to end up on a canvas.


This set is just delicious, apart from the grasses all the other little elements are so useful. I love that leaf in particular. 

I hate to waste paint so having used a bit of cut up kitchen sponge to apply the paint through my stencil, I pounced it all over a piece of white cardstock I had lying about on my desk and rubbed the excess paint through my stencil and got a pretty interesting background. The panel was small, approx. 6 x 4 inches so the same skeleton leaf and poem text fit but I needed a focal image.
I found the very first Lin Brown set I ever bought, the one with the lovely lino cut style flowers on it, and added that flower. I'm pleased with the result, here it is:


Materials used:
Paperartsy Stamp sets ELB30, ELB03
Ranger archival Ink : Jet Black, Cornflower Blue
Fresco Finish Chalk Paints : Lilac, Pansy, Sky Blue, Sage, Hey Pesto


Sunday, 14 February 2016

Alpha/Dictionary Challenge 2016 : F

The word I chose for this fortnight's Craft Barn Dictionary challenge using the letter F, is Fashion.
This is a messy one but thanks to all who suggested sticking the pages of the book together, much easier.


Stamps used : Tim Holtz Runway
I started by attempting to brayer distress ink on the pages for the background and stamped some random bubble wrap in purple archival ink but I did not like the look of it so knocked it back with some chalk Fresco Finish acrylic paint. Images of the runway models are stamped in black versafine ink and coloured with distress markers.
I added the heart and border with a black pen.

This is my entry for the challenge,  a bit rushed as I had so little time this weekend but I'm glad it is finished.


Sunday, 7 February 2016

New PaperArtsy Stamps

For those who watched the launch videos of the new PaperArtsy stamps and stencils last week, weren't they great. I have the lovely set EKC02 by Kay Carley so today I decided to play with it.
If you missed the blog post for the new stamps by Kay, here it is:
http://blog.paperartsy.co.uk/2016/02/new-pa-products-feb-2016-kay-carley.html

I think I have been influenced a little by the colours used for the samples but they are not the same as I don't have the new Fresco paints (of course I want them, especially that lovely mint green).


I used Fresco paints for the backgrounds, applied with a brayer and added some random stamping from PaperArtsy sets. The big circles for the Allium were applied through a stencil.
Paint used :
Vintage Lace, Eggplant, Pansy, Rose and Snowflake.
Background images stamped using Ranger archival ink- Blue Violet and snowflake paint.
Allium, butterflies and flowers stamped in black archival ink.
Stitching around the edge added with black pen.
I added some white pen to the portrait format card but decided to leave the other panel alone, I quite like the sketchy look of it without any colour added.

I love this set of stamps, I think I may be using elements of it a lot.

If you want to see close ups of Kay's beautiful work go check out her blog :


Sunday, 8 November 2015

Fireworks

When I saw the theme for the Craft Barn challenge this week the first thing that popped into my head was the Katy Perry song, Firework.

Ignite the light
And let it shine
Just own the night
Like the Fourth of July

Rather than over thinking this one I have made a firework display panel, mixed media style.


The background is a mixture of DecoArt mixed media paint applied with an old credit card and some translucent PaperArtsy Fresco finish paint applied with a brush over the top.
The landscape silhouette is die cut using a Memory Box die.
The stars were punched (Woodware star punch) from some scraps I had left over from a gelli plate stamping project and I added some doodling with a white pen to make them look like fireworks.

It was fun to do this one, a nice break from the Christmas cards.
Have a good week everyone.

Thursday, 15 October 2015

Firelight

When I saw that this week's Craft Barn challenge was "Light" it was the perfect prompt to get out a kit I purchased at the Craft Barn over a year ago and get it made. It is a Tando Creative kit designed by Karen Gist called Christmas Fireplace. So, my interpretation of light is firelight.


Can you see the tea light flickering in the grate? Obviously it is not a real tea light it is a battery operated one, this piece is made of chipboard and we don't want disasters in the home do we.

I used a Fresco finish and Decoart mixed media paints to paint all the chipboard pieces. I added some doodling with a white pen on the baubles and stockings and glitter of course. There is a bit of distress ink on the bunting over the fireplace as well, I stencilled the stars. For the wood effect on the fireplace I used coffee archival ink and a Kaisercraft woodgrain stamp.

Here's another photo taken outside.

Now you can see the glossy accents on the "Christmas" word and the berries. My favourite bit of this project is the tiling. These pieces were painted with Decoart Cadmium Red mixed media paint with some gold interference paint added on top and finished off with a bit of treasure gold.

A close up of the tiles:

See the little tea light inside, I picked up a pack of three for £1 from the Pound Shop.
I had great fun with this project and am proud of myself for finally getting it made.


Sunday, 10 August 2014

Playing with Stencils

Today I did some experiments with my JOFY flower stencil. Ink, paint and doodling, lots of fun. They all ended up on cards which is handy as I have a few birthday cards to send this month.


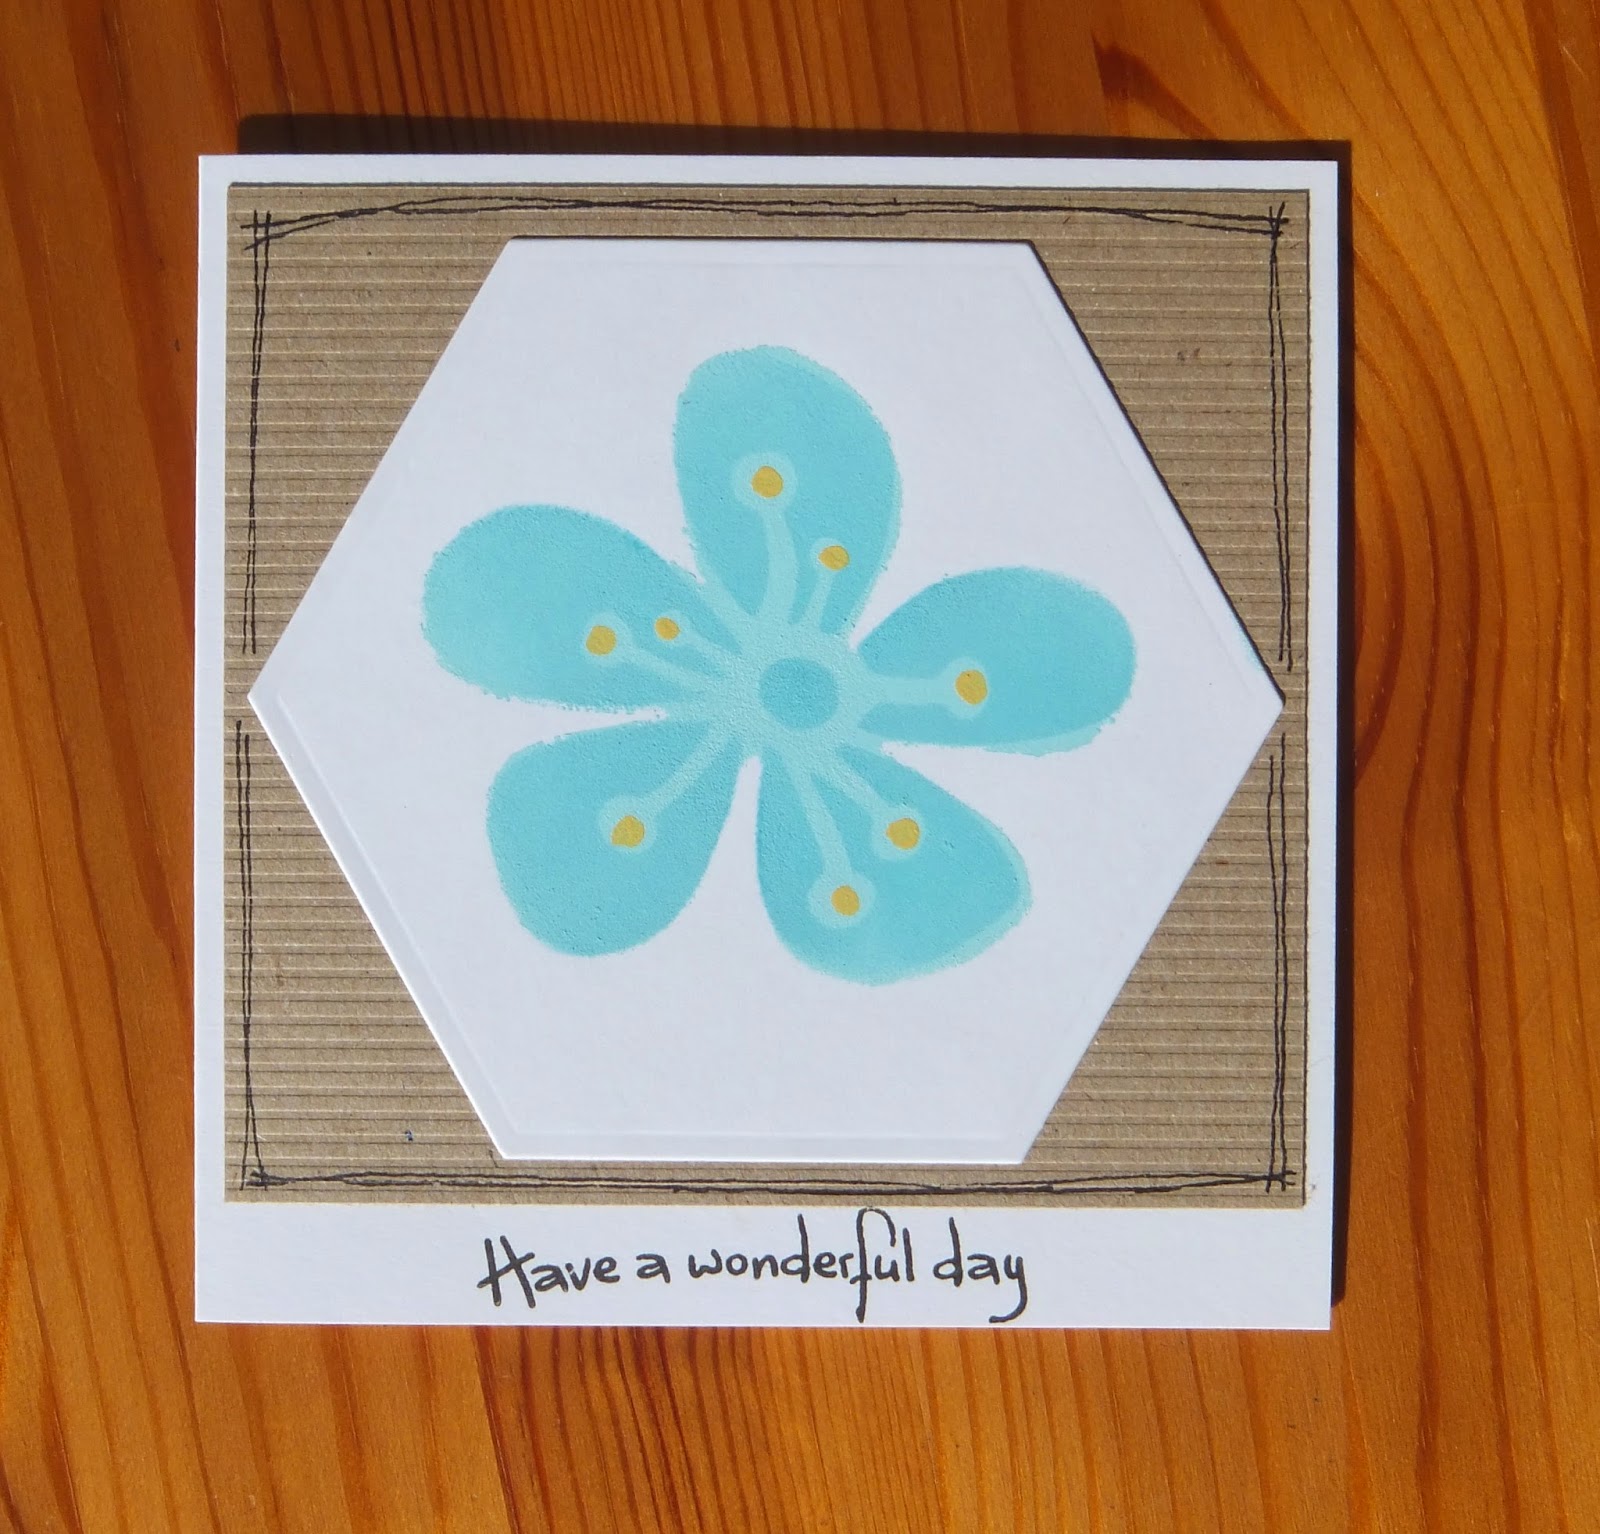
This one is stencilled with PaperArtsy Fresco Finish paints. The base flower is mermaid and the then I added Beach Hut over the top. Beach Hut is a translucent paint so the effect is quite interesting. There is a doodle flower on one of the new JOFY stamp sets that fits over the stencil flower but I don't have that set so I drew the doodle flower and added a few highlights in Haystack paint. Mounted on Kraft card with Happy Birthday sentiment.

The second card is the same base flower in Mermaid paint but I wondered what would happen if I added distress ink on top.


Peacock feathers distress ink on the flower overlay and highlights of Haystack paint. This one was supposed to have been a one layer card but I made a bit of a mess. I salvaged it with a Spellbinder hexagon die, mounted it on ribbed Kraft card and I think it works.

So, what does it look like using ink instead of paint?


This one has Tumbled Glass DI applied to the base flower and Peacock Feathers DI for the flower laid over the top. The image is crisper. I liked the blobs of Haystack paint added before so did the same with this one. The sentiment is coloured with Promarker pens to match the flower and the panel mounted onto a Kraft card.

This is a nice stencil. There are 4 flowers, a base flower and 3 that can overlay it to build up layers. 
PaperArtsy stencil PS009.
Go see the designer's samples at Jo Firth-Young's blog.

Sunday, 20 April 2014

Happy Easter

A quick simple card for Easter.


Background : Kraft card embossed and die cut with a Marianne Designs embossing folder - Tulips.
Tando Creative eggs, bows and chicks painted with PaperArtsy Fresco finish paint.

Happy Easter.

Saturday, 22 March 2014

Little Houses

A project that I really enjoyed doing, a key hanger using a Tando Creative kit.


The parts are thick card except for the base which is made of wood. I used a mixture of PaperArtsy Fresco Fonish paints and Tim Holtz Distress paint for this project.
TH Distress Paint : Iced Spruce, Antiqued Bronze and Tarnished Brass.
Fresco Finish Paint, London Bus, Irish Cream.

The houses are painted with the Irish Cream acrylic paint and then I used a Crafty Individuals crackle stamp with Jasmine Mixed Media Inx by Colorbox. Here is a close up:


For the roof detail , I used a Kaisercraft Wood Grain stamp and coffee archival ink over the London Bus paint. The script on the background panel is an Inkylicious stamp called Latin Text. A close up of the roof:


This project took me some time but was worth it, I shall send it to my Mum for Mother's Day. I bought my kit from The Craft Barn, the link shows the same project in a different colourway. All I need to do now is find a way to wrap it.


Saturday, 26 October 2013

Santa is Distressed

A quick update on my Christmas card making.
This one was quite quick and easy to do. Snowflake Fresco Finish acrylic paint dry brushed onto a square piece of Kraft card. The Tim Holtz vintage Santa, poinsettias and sentiment are stamped using coffee archival ink and the panel edged with Cosmic Shimmer gliding flakes (Warm Sunrise).


Sunday, 20 October 2013

12 Tags of 2013 - October

I like to do Tim's Tags each month, I like to improvise if I don't have the ingredients, however ..... this one has cost me money!
Click here for Tim's Tutorial .

I started about a week ago with the background. I don't have the Distress paints but I do have PaperArtsy Fresco Finish paints. It is 10pm and I'm on the floor in my spare bedroom marbelling paint! A nice messy job but I'm pleased with my background.
The following night I am feeling smug, I have the lovely frame die in my stash already. I don't have grunge board but I do have grunge paper so I cut the frame. I don't have any Distress Glitter, in fact I don't have any purple glitter either and I wish I did because I'd like to try that. I found some dark purpley green fine glitter and used that instead.

No moon and owl die, what a shame.
I planned to draw a moon and cut it out and use a small Tando wooden owl that I have already. The owl looked stupid on the tag and didn't I use that same owl last year on the October Tim tag? Yes, I think I did.
I have a half finished tag and I am not happy!
Yes, you guessed, I bought the owl and moon die and whilst I was about it I bought some mustard seed distress glitter as well. It is lovely, I don't normally like glitter but this stuff is crunchy and I like the textured finish. I decided not to put glitter on my owl having overdosed on the glitter stuff already so my owl was inked with black soot distress ink and then covered in glossy accents. I have a shiny owl and I like him.
I have no metal stars so I used some metal squares I found in my stash.
Here is my tag, a bit of an effort this month but at least I managed to complete the project.


Saturday, 15 June 2013

Tando Frames

Just a quick post for today's project which I started last weekend and finished off this afternoon.


This is a Tando Creative Hexagonal Frame painted with Fresco paint in sky blue and then on top was a layer of Kroma Crackle mixed with a tiny bit of poppy Fresco acrylic paint. I left the frame for 24 hours for the crackle effect to happen and I am impressed. Its great to use, you layer it on thickly and it finds its own level then when it dries it cracks nicely to show the blue in the background.
The flowers are from JOFY 11 (PaperArtsy) and painted with poppy, eggplant and hey pesto acrylic paint. 


Sunday, 9 June 2013

Lynne Perrella Fan

I've had a busy Sunday, the morning spent catching up on jobs around the house and the afternoon catching up on unfinished projects.
Using one of the new oriental Lynne Perella PaperArtsy stamp plates and one of the new Tando Creative fan kits, this is the result of my playing. I saw similar demo'd last weekend at the Craft Barn by Karen Gist and was itching to have a go.


Materials:
Tando Creative ORIENTFAN2 - using the medium sized fan
Lynne Perrella Collection LPC021
PaperArtsy Fresco finish acrylic paints : Squid ink and pansy
Crafty Individuals crackle background stamp
Ranger Perfect pearls : Gold, Cosmic Shimmer : Marine Aqua
Memento Dew drop dye ink : Elderberry and Brilliance Dew drop pigment ink : Galaxy Gold
Black archival ink and ultra fine embossing powder

The background is painted with pansy fresco finish acrylic paint and stamped with the crackle stamp using purple and gold. The frame is painted with the squid ink arcrylic paint, ooh, lovely colour.
I stamped the oriental lady image three times on white card (well, 4 actually in case I messed up and I did mess up) and heat embossed using the ultra fine embossing powder. Then the images were painted with cosmic shimmer mica pigment and gold perfect pearls. Then the tricky bit, I drew around the part of the images I wanted to use with a pencil using the frame of the fan as a stencil, cut them out and stuck them to the background. I used Pinflair Foto-Glue as its repositionable and this does require a bit of fiddling to get them all lined up as the frame is quite thin and doesn't leave a lot of room for error. 
The frame was stuck on with Mod Podge, I couldn't think what else to use so popped a heavy book on top of it and left it alone for an hour or so. That worked, all stuck firmly together.

I really enjoyed making this and I've another one waiting to be decorated in the pack, a smaller one. I'm thinking it needs some of those flowers in it .... you know the ones I mean.


Sunday, 24 February 2013

JOFY Stamps

Are we ever going to see some sunshine? Its a grey, cold February Sunday and I reckon if its winter outside then inside there can be Spring. So, today's project was to experiment with my JOFY stamps and try out something a little different .... painting with Fresco Finish acrylic paints, I am starting a collection!
I watched the YouTube video from PaperArtsy this morning with a tutorial on using the opaque and translucent paints so the inspiration for my project came from there.
I used the JOFY09 set of stamps for the images and the butterfly is from one of the new sets, JOFY11.
Here it is:

The thermometer is a wood substrate. First I painted it in Nougat which is an opaque paint and gives a good neutral coverage to the bare wood for adding more layers of paint. Then I used a couple of the translucents for the background, Beach Hut and Hey Pesto. This gives a nice shabby distressed look.
I then stamped the flowers and words in black archival ink and heat set it with a heat gun, just to be sure and because I was eager to get on with this project.
The flowers, leaf and grasses are then painted with watered down layers of paint. I used Pumpkin Soup, Hey Pesto, Hyde Park, Beach Hut and Inky Pool.
I was happy with the result but there was something missing so I stamped the butterfly, stood back, looked at it .....oh no! The butterfly was upside down!! All was not lost because Leandra says in the video that opaque paints really are opaque and will cover up anything and its true. I started again with Nougat over the butterfly and once dry added more Beach Hut and it is fixed. Stamped the butterfly the correct way up, painted it and there you go, finished project.

I also wanted to try out a card, inspiration from a fabulous tag by Linda Cain, thank you Linda.
Distress inks used for the background and drops of water to get a faux batik effect. The flowers are again from JOFY09 .... ah, I have got so much use out of that set .... and coloured with distress markers. It was Linda's idea of using the white pen that I wanted to try but I only had a Sakura Souffle pen in white so I had a go and this is the result. I must add a decent white pen to my shopping list.


Finally for today, another card, this time using two of the new JOFY Minis. Images stamped in black archival ink on white card, mask off the panel so that the background remains white and add distress ink to the background. I coloured the leaf using walnut stain distress marker and the buds in the same. This is then mounted on Kraft card.