There is something fishy going on, this is my first post of 2019 and it is May already. I've not been idle but have a lot of catching up to do.
Fossil fish stamp from PaperArtsy.
The background is a mix of Fresco paints with some Golden Sands infusions on top to try to make it look like sandstone.
I'll try not to leave it so long before I post the next project and will visit blogs very soon.
Have a great weekend x
Showing posts with label PaperArtsy. Show all posts
Sunday, 5 May 2019
Sunday, 15 October 2017
Craft Barn Twelve Month Challenge : October
Here we go, my October entry for the Craft Barn Twelve Month Challenge.
The verse for October is :
Fresh October brings the pheasant
Then to gather nuts is pleasant
I thought pheasants ought to feature in this one and I wanted to use my Scrapcosy acorn branch stamp for the "nut" element. Here is the mini page I came up with for October;
The background card is from my stash, coloured with distress oxides (wild honey, spiced marmalade and vintage photo). There is a bit of water spritzing there, just a little.
I stamped the branch in potting soil archval ink and coloured it with inktense pencils, they work on top of distress oxides which is new thing I tried today. Acorns are shiny so there is some glossy accents on that acorn, it doesn't show that well in the photo but it is there.
I printed off a couple of pheasants from the internet, cut them out and added them. They were tiny so the cutting was a challenge!
Autumn is so inspiring for arty crafty projects.
I'm off to see what others have done for the challenge now.
Catch you later and thanks for visiting.
Monday, 28 August 2017
Blues and Greens Challenge
I had the time and felt like doing a challenge so decided to make an entry for the August Country View Challenge. The theme is Blues and Greens, a great colour combination. I was going to make a tag but changed my mind and made a small canvas. Here it is, photo taken outdoors in the sun so the colours look a little paler than in reality:
For the background I used an old book page and some torn music paper and painted it with Granny Smith and Teresa Green Fresco paints.
I added some circles stamped in chalk paint with a bottle top.
This is watercolour card stock with PaperArtsy infusions : In the Navy and the middle panel was an experiment with a few greens, The Sage, Emerald Isle and Slime I think. I didn't use that one. I die cut some Tim Holtz wildflowers from the larger panel and used the TH butterfly punch.
At this stage I thought the canvas needed a bit of stamping so I added some text with leaf green archival ink and the bubbles in cornflower blue. Sticking to the blues and greens for the stamping I was happy with the background. I added the die cut flowers and butterflies plus a TH quote chip colour tinted with the infusions.
Here is a close up so you can see the book text still shows through the paint although they were opaques, I watered them down a little.
Ingredients used for this canvas:
PaperArtsy Infusions : In the Navy
Ranger Archival ink : Fern Green and Cornflower Blue
Tim Holz Wildflower dies
PaperArtsy Fresco paints : Teresa Green, Granny Smith and Chalk.
Stamps : PaperArtsy Mini MN61 and Indigo Blu Bubbles background.
Tim Holz butterfly punch.
This is my entry for August on the Country View Crafts' Challenge Blog.
Thank you for visiting today.
Monday, 26 June 2017
New PaperArtsy Stamps
I am loving the new PaperArtsy releases and I predict they are going to be costing me a fortune. My first purchase was Kay Carley's beautiful foxglove set EKC08 and the new stencil PS061.
Check out the PaperArtsy blog post, Kay's example's are stunning :
http://blog.paperartsy.co.uk/2017/06/new-paperartsy-products-eclectica-kay.html
Inspired by Kay's work I had a play and made up a couple of little cards. Here is one of them.
The background was an experiment with infusions which went a bit wrong so I used Chalk Fresco Finish paint on top of it, I quite like that effect.
I used Distress oxides Faded Jeans and Wilted Violet for the stencilling then stamped the smaller of the two foxgloves from the set in black. I added some of the other flowers in black and cornflower blue archival ink and coloured them with distress oxides. One of the bees is cut out and mounted on a foam pad so he stands off the foxglove.
That was fun, I know I will use the stamps and the stencil a lot.
Thanks to Kay and to PaperArtsy for another great release!
Check out the PaperArtsy blog post, Kay's example's are stunning :
http://blog.paperartsy.co.uk/2017/06/new-paperartsy-products-eclectica-kay.html
Inspired by Kay's work I had a play and made up a couple of little cards. Here is one of them.
The background was an experiment with infusions which went a bit wrong so I used Chalk Fresco Finish paint on top of it, I quite like that effect.
I used Distress oxides Faded Jeans and Wilted Violet for the stencilling then stamped the smaller of the two foxgloves from the set in black. I added some of the other flowers in black and cornflower blue archival ink and coloured them with distress oxides. One of the bees is cut out and mounted on a foam pad so he stands off the foxglove.
That was fun, I know I will use the stamps and the stencil a lot.
Thanks to Kay and to PaperArtsy for another great release!
Thursday, 23 March 2017
Infusions Take 2
It crossed my mind that I said I would share a few more of my infusions experiments a couple of weeks ago so here they are.
First a tag using metallic glaze with Emerald Isle and Black Knight infusions for the background.
Stencil : PaperArtsy PS049 by Scrapcosy
Stamp : PaperArtsy Hot Picks HP1507EZ
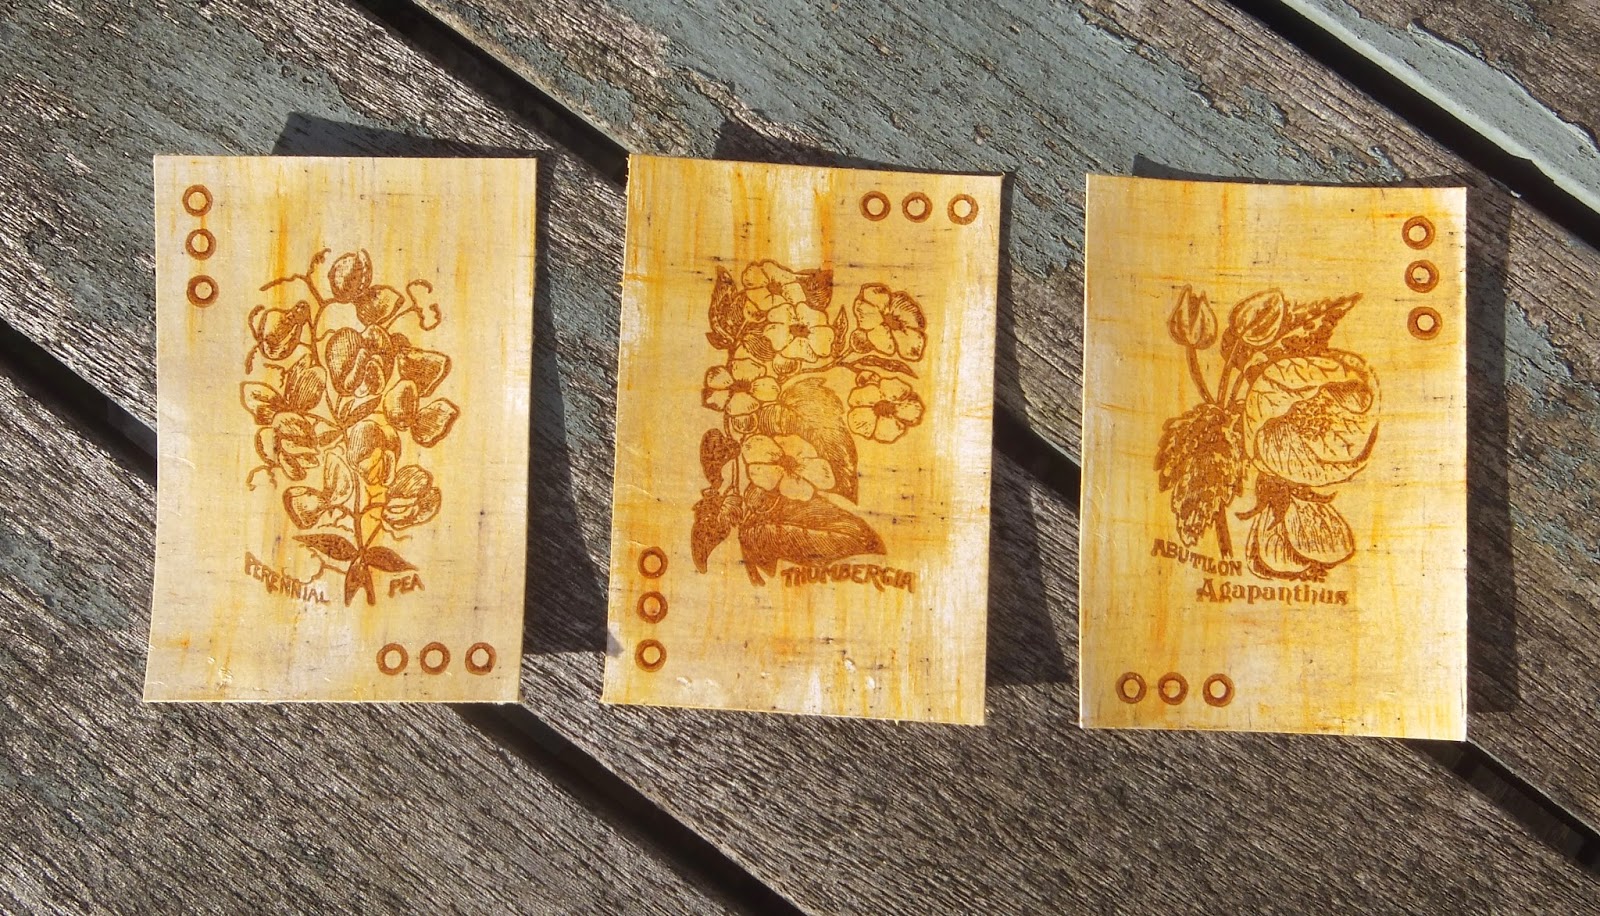
.... and a set of ATCs. The backgrounds are metallic glaze again with Golden Sands infusions applied with a brush.
First a tag using metallic glaze with Emerald Isle and Black Knight infusions for the background.
Stencil : PaperArtsy PS049 by Scrapcosy
Stamp : PaperArtsy Hot Picks HP1507EZ
.... and a set of ATCs. The backgrounds are metallic glaze again with Golden Sands infusions applied with a brush.
Stamps : PaperArtsy ESC01 by Scrapcosy
Monday, 30 January 2017
PaperArtsy Pink and Orange Challenge
Having spent most of January drooling over the spectacular new releases from PaperArtsy and purchasing a couple of the new stamp plates I decided I should get busy and use them. The inspiration posted by Darcy for Topic #1 : Pink and Orange was fantastic, I could easily have been inspired by several of those ideas. I chose the fabric picture with sequins, the colours reminded me of sari fabrics which are typically hot colours with gold accents.
I have made a small canvas for my entry. My plan was to have pink and orange stripes in the background with sequins dotted around and then use my new Tracy Scott stamp set for the focal image. Here it is.
Fresco Chalk Paints :
Bougainvillea, Smoked Paprika, Pumpkin Soup, Rose, Old Gold.
(ooh - Bougainvillea blends so well with that Smoked Paprika paint, rather pleased with the result on the flower)
Stamps :
Eclectica ETS08 by Tracy Scott.
I painted some white card and then stamped the flower, cut it out and stuck it on the canvas. Same idea for the centre of the flower which was old gold on top of pumpkin soup.
Archival Ink:
Jet Black and Monarch Orange
Finished off with some sequins, gold flake and bit of gold sparkle pen on the stem.
Hope you all have a good week and thank you for visiting. x
I have made a small canvas for my entry. My plan was to have pink and orange stripes in the background with sequins dotted around and then use my new Tracy Scott stamp set for the focal image. Here it is.
Fresco Chalk Paints :
Bougainvillea, Smoked Paprika, Pumpkin Soup, Rose, Old Gold.
(ooh - Bougainvillea blends so well with that Smoked Paprika paint, rather pleased with the result on the flower)
Stamps :
Eclectica ETS08 by Tracy Scott.
I painted some white card and then stamped the flower, cut it out and stuck it on the canvas. Same idea for the centre of the flower which was old gold on top of pumpkin soup.
Archival Ink:
Jet Black and Monarch Orange
Finished off with some sequins, gold flake and bit of gold sparkle pen on the stem.
Hope you all have a good week and thank you for visiting. x
Sunday, 22 January 2017
Playtime
Just having a little play.
Here is a small panel of happiness using distress crayons and PaperArtsy Eclectica EEG16 rubber stamps by Emma Godfrey.
Saturday, 14 January 2017
Craft Barn Twelve Month Challenge : January
A new year and a new challenge from the Craft Barn, this year the challenge is based on Sara Coleridge's poem, The Months.
January brings the snow
makes our feet and fingers glow
Click here for the link to the challenge page to join in.
This year I had a plan which is a massive improvement on 2016 when I had no plan for the alpha/dictionary challenge other than the dictionary itself. My original plan was to make postcards and send them to people each month but my plan is now modified. I am going to make a mini book with twelve pages in it, one for each month. Now, the postcard idea was still in my head so that is how I dealt with Mickie's twist challenge for January which is to include a bird in wellington boots. I had to draw the boots and the bird but I have made it into a postage stamp and stuck it on the page.
About three years ago I went to a workshop at the Craft Barn by Kay Carley, the first craft class I had ever attended! We did two lovely winter scenes using Lavinia stamps so I thought I would revisit that style for my January entry. Here it is:
Stamps used:
Lavinia Stamps : Spring Trees
Kanban : Stag and Doe
Woodware : Deck the halls
Paperartsy : ELB30 by Lin Brown
Clarity Stamps : postage stamp
The background is made using distress ink : Milled Lavender, Tumbled Glass, Stormy Sky and Chipped Sapphire. The trees are stamped with stormy sky and the fir branches are stamped with silver ink, I think you can see those silver branches if you look closely, they are subtle.
The rhyme is from the poem on the Lin Brown set which I fortunately have so hope to be able to use it for all the pages in the challenge over the year but I think it might be a challenge to do that as the text is small.
I finished it off with some Stampendous Frantage shabby white embossing enamel to make the snow, I love that stuff, gorgeous little bits of gold in with the white.
OK, thats me done for this post, enjoy your weekends wherever you are and thank you for dropping by.
Sunday, 4 September 2016
Playtime with Paperartsy
It rained yesterday but rain does not stop play does it. A great excuse to catch up on jobs around the house and take some time out to play in my craft room.
My new set of Lin Brown stamps arrived in the week. As soon as I saw this release I knew I could not resist so purchased ELB30.
They are on the Paperartsy blog here:
http://blog.paperartsy.co.uk/2016/08/new-pa-products-by-lin-brown.html
Inspired by Lin's example, I pretty much copied the style and design to get me into the mood. I wanted the panel to end up on a card so adapted it a bit and left some elements out as my panel was smaller than the grass stamp. It is big and begging to end up on a canvas.
This set is just delicious, apart from the grasses all the other little elements are so useful. I love that leaf in particular.
I hate to waste paint so having used a bit of cut up kitchen sponge to apply the paint through my stencil, I pounced it all over a piece of white cardstock I had lying about on my desk and rubbed the excess paint through my stencil and got a pretty interesting background. The panel was small, approx. 6 x 4 inches so the same skeleton leaf and poem text fit but I needed a focal image.
I found the very first Lin Brown set I ever bought, the one with the lovely lino cut style flowers on it, and added that flower. I'm pleased with the result, here it is:
Materials used:
Paperartsy Stamp sets ELB30, ELB03
Ranger archival Ink : Jet Black, Cornflower Blue
Fresco Finish Chalk Paints : Lilac, Pansy, Sky Blue, Sage, Hey Pesto
Saturday, 13 August 2016
Alpha/Dictionary Challenge 2016 : Z
The alpha dictionary challenge this time is Z with a pearl. Just a little pearly twist this time, hmmm, well I didn't want to just stick a pearl somewhere on the page because the dictionary pages are so flimsy so I had no choice, I had to draw one.
I chose Zircon for my Z word and thanks to a bit of brainstorming with my pal over lunch in the office, I have opted for jewellery theme. Zircon is a gemstone (not to be confused with cubic zirconia which is a man-made crystal), often used to simulate diamond but comes in many colours, the most popular for jewellery being blue.
I used only one stamp on this page, the gemstone from a Lynne Perrella set. I drew the beads for the necklace and the shell with the pearl inside. Actually it looks a bit fat, more like a flower, it is a bit puffy. Ha! It was good fun to do and I probably should have drawn it in pencil first but you live and learn! From a distance the page looks a bit like a face, actually, the more I look at the page the more I am thinking this is not my best effort so will try to do better next time.
Have fun everyone,
Catch you later. x
Sunday, 12 June 2016
Stars
The theme for the Craft Barn two weekly challenge is stars. All I could think of was stencilled stars as a background, that was what I wanted to do and I really have no idea what came into my head but I ended up with this card.
I stamped the focal image (JOFY JM30) and masked it out then add the stars with a Tim Holtz star stencil using Abandoned Coral TH Distress ink trying to fade the stars out in the middle around the pile of gifts. The edges are highlighted with Black Soot distress ink and to finish off the background I doodled around some of the stars. The gifts are coloured with distress pens.
I am not very happy with it, I think it is missing something but am not sure what. Maybe it should have a sentiment? Maybe it would have been better as a star background with a quote or sentiment as the focal image. I'll post it anyway, I have run out of steam with this one.
I stamped the focal image (JOFY JM30) and masked it out then add the stars with a Tim Holtz star stencil using Abandoned Coral TH Distress ink trying to fade the stars out in the middle around the pile of gifts. The edges are highlighted with Black Soot distress ink and to finish off the background I doodled around some of the stars. The gifts are coloured with distress pens.
I am not very happy with it, I think it is missing something but am not sure what. Maybe it should have a sentiment? Maybe it would have been better as a star background with a quote or sentiment as the focal image. I'll post it anyway, I have run out of steam with this one.
Sunday, 15 May 2016
A Little Sunshine
I have been playing with PaperArtsy Infusions, just a little play because the weather is good and I need to be outside. These lovely little pots have great names and I chose Golden Sands and Violet Storms for this project because they match the changeable weather in May.
The Two Weekly Challenge at the Craft Barn is "Sun" so this is my entry.
Stamps used : PaperArtsy Lynne Perrella LP033
I stamped and embossed the images in black, painted water onto the sun and sprinkled it with infusions then spritzed it with water. I find that works best on ordinary stamping card. Then added the violet storms around the rest of the panel to make it dark and stormy. The images are coloured with distress pens. I added some Tim Holtz Chit Chat words and scruffed up the edges of the card with a sanding tool and mounted it on some purple card.
I hope you have all been enjoying your weekends and I wish you lots of sunshine next week.
The Two Weekly Challenge at the Craft Barn is "Sun" so this is my entry.
Stamps used : PaperArtsy Lynne Perrella LP033
I stamped and embossed the images in black, painted water onto the sun and sprinkled it with infusions then spritzed it with water. I find that works best on ordinary stamping card. Then added the violet storms around the rest of the panel to make it dark and stormy. The images are coloured with distress pens. I added some Tim Holtz Chit Chat words and scruffed up the edges of the card with a sanding tool and mounted it on some purple card.
I hope you have all been enjoying your weekends and I wish you lots of sunshine next week.
Tuesday, 19 April 2016
April Showers
Sunday morning chilling out on the sofa, I was watching a PaperArtsy YouTube video by Sara Naumann entitled Journal Cover Collage. The technique used stamping on tissue which has been a recent discovery for me with the alpha/dictionary project so I thought I would give this a try for the Craft Barn Two Weekly Challenge. The theme for the challenge is April Showers.
Here's a link to the YouTube video:
https://www.youtube.com/watch?v=EpP83rgoDTM
My entry for the challenge is a small journal book cover.
I used an Instagram photo image for the background, the stamps used on the tissue are from Inkylicious and the background dotty paper from Kaisercraft. I really like that ghostly effect the tissue over the picture makes. Do watch the Sara Naumann video to see how to do it.
PaperArtsy Frseco finish paint used was snowflake.
I added a few ribbons and threads from my stash plus a couple of tiny shrink plastic tags. Can you see them? They are tiny.
Now I have my empty journal book, what shall I put in it? Maybe some experiments.
Here's a link to the YouTube video:
https://www.youtube.com/watch?v=EpP83rgoDTM
My entry for the challenge is a small journal book cover.
I used an Instagram photo image for the background, the stamps used on the tissue are from Inkylicious and the background dotty paper from Kaisercraft. I really like that ghostly effect the tissue over the picture makes. Do watch the Sara Naumann video to see how to do it.
PaperArtsy Frseco finish paint used was snowflake.
I added a few ribbons and threads from my stash plus a couple of tiny shrink plastic tags. Can you see them? They are tiny.
Now I have my empty journal book, what shall I put in it? Maybe some experiments.
Sunday, 10 April 2016
Alpha/Dictionary Challenge 2016 : D
D = Difficult, I deliberated and dug deep until I finally decided on DOOR.
A bit of brainstorming over lunch with a friend at work led us down a very dark route of devils, disasters and demons but she suggested door and I have purchased a couple of the new PaperArtsy Hot Picks sets which, as luck would have it, feature lovely images of doors. That new Hot Picks release for 2016 was pretty awesome, I really did want them all!
There is a twist on the Craft Barn Alpha/Dictionary challenge for the letter D, the colour pink has to be included. So, my main door image is pink of course.
I am learning a lot from all you bloggers out there so this time I tried stamping on tissue paper, I like this, the words on the page still show through. For the main image, I originally stamped on tracing paper but the ink did not dry despite trying to heat set it, leave it over night and blot it on copy paper. I binned that idea and decided to stamp on printer paper, colour it with watercolour pencils, cut it out and stick it to the page. This pleased me.
Stamps used :
PaperArtsy Hot Picks HP1601 and HP 1605.
OK, time to upload this one and go see what others have done for this challenge.
Enjoy the rest of Sunday. x
A bit of brainstorming over lunch with a friend at work led us down a very dark route of devils, disasters and demons but she suggested door and I have purchased a couple of the new PaperArtsy Hot Picks sets which, as luck would have it, feature lovely images of doors. That new Hot Picks release for 2016 was pretty awesome, I really did want them all!
There is a twist on the Craft Barn Alpha/Dictionary challenge for the letter D, the colour pink has to be included. So, my main door image is pink of course.
I am learning a lot from all you bloggers out there so this time I tried stamping on tissue paper, I like this, the words on the page still show through. For the main image, I originally stamped on tracing paper but the ink did not dry despite trying to heat set it, leave it over night and blot it on copy paper. I binned that idea and decided to stamp on printer paper, colour it with watercolour pencils, cut it out and stick it to the page. This pleased me.
Stamps used :
PaperArtsy Hot Picks HP1601 and HP 1605.
OK, time to upload this one and go see what others have done for this challenge.
Enjoy the rest of Sunday. x
Monday, 4 April 2016
Playing with Bleeding Art Tissue
Over the Easter weekend I was having a bit of a play as the weather was not so kind to us. My plan was to do a small canvas with bleeding art tissue but I also had a scrap of card to practice on which turned into a finished piece, always nice when that happens.
Circles were die cut from bleeding art tissue and applied direct to canvas with water and left to dry for five minutes before peeling them off and discarding the tissue. Then add a few more circles to layer up the colours and repeat.
I then used a stencil, Finnabair bubbles, that stencil I have used a lot recently, adding some milled lavender distress ink. To finish the background layers I added some rubber stamped circles using white paint (PaperArtsy Hot Picks 1102).
The focal image is a PaperArtsy JOFY stencil (PS007). I used Imagination Crafts glitter paste to give it a bit of sparkle.
Same technique used on this panel with the bleeding art tissue, stencilled circles and rubber stamping. This time I used black ink through some stencils for the images and added a sentiment.
Stencils :
Andy Skinner : Baroque
Imagination Crafts : Wildflower
"I want to be improbable and beautiful, afraid of nothing, as if I had wings."
- Mary Oliver : Starlings in Winter
Wednesday, 23 March 2016
Circle Layering
Here is my entry for the Craft Barn fortnightly challenge. The theme this fortnight is circles and they must be in the background. A good opportunity to play with stencil layering again.
Stencils used:
Finnabair Elementals "Bubbles"
Crafters Workshop " Mini Cornflowers"
Distress Inks :
Peacock Feathers, Squeezed Lemonade and Picked Raspberry.
Stamp :
Paperartsy Squiggly Ink SM15
I applied gesso through the bubble stencil first as a resist. Then added the distress inks and let it dry. The next layer was the stamped circles in archival ink and finally I added the cornflower stencil using black versamark ink. Highlights have been added to some of the circles with a white pen.
Stencils used:
Finnabair Elementals "Bubbles"
Crafters Workshop " Mini Cornflowers"
Distress Inks :
Peacock Feathers, Squeezed Lemonade and Picked Raspberry.
Stamp :
Paperartsy Squiggly Ink SM15
I applied gesso through the bubble stencil first as a resist. Then added the distress inks and let it dry. The next layer was the stamped circles in archival ink and finally I added the cornflower stencil using black versamark ink. Highlights have been added to some of the circles with a white pen.
Tuesday, 1 March 2016
Alpha/Dictionary Challenge 2016 : L
The next letter in the Craft Barn Alpha/Dictionary challenge is L. Lots of ideas but sometimes, the dictionary definition just doesn't fall in the right place on the page does it! So, I chose 'LEAF' for my word. Mainly because I love using leaves anyway and because I had an idea that I could make the pages look a bit like leaves that had been pressed in the pages of a book. What do you think? Did it work?
I started with a coat of white gesso on the pages leaving the definition visible. Then using my PaperArtsy stencil by Lin Brown (PS002) I applied Toad Hall Fresco Finish paint through parts of the stencil with a sponge. When dry, the leaves are outlined with a Ground Espresso distress marker.
The stamped images under the definition are from a Paperartsy Hot Picks set : 1102EZ, distress markers scribbled onto the stamp and applied to the page.
I wanted a border on the page so stamped some tiny leaves in ground espresso distress (messy, the leaf stamp was an acrylic stamp and doesn't work so well on the gesso as rubber stamps - learned that lesson!).
Then I added some die cut TH tattered leaves that I had left over from other projects.
At this point I was tempted to add more leaves but I decided to leave it alone.
That's it, my entry for the challenge done.
I started with a coat of white gesso on the pages leaving the definition visible. Then using my PaperArtsy stencil by Lin Brown (PS002) I applied Toad Hall Fresco Finish paint through parts of the stencil with a sponge. When dry, the leaves are outlined with a Ground Espresso distress marker.
The stamped images under the definition are from a Paperartsy Hot Picks set : 1102EZ, distress markers scribbled onto the stamp and applied to the page.
I wanted a border on the page so stamped some tiny leaves in ground espresso distress (messy, the leaf stamp was an acrylic stamp and doesn't work so well on the gesso as rubber stamps - learned that lesson!).
Then I added some die cut TH tattered leaves that I had left over from other projects.
At this point I was tempted to add more leaves but I decided to leave it alone.
That's it, my entry for the challenge done.
Sunday, 7 February 2016
New PaperArtsy Stamps
For those who watched the launch videos of the new PaperArtsy stamps and stencils last week, weren't they great. I have the lovely set EKC02 by Kay Carley so today I decided to play with it.
If you missed the blog post for the new stamps by Kay, here it is:
http://blog.paperartsy.co.uk/2016/02/new-pa-products-feb-2016-kay-carley.html
I think I have been influenced a little by the colours used for the samples but they are not the same as I don't have the new Fresco paints (of course I want them, especially that lovely mint green).
If you missed the blog post for the new stamps by Kay, here it is:
http://blog.paperartsy.co.uk/2016/02/new-pa-products-feb-2016-kay-carley.html
I think I have been influenced a little by the colours used for the samples but they are not the same as I don't have the new Fresco paints (of course I want them, especially that lovely mint green).
I used Fresco paints for the backgrounds, applied with a brayer and added some random stamping from PaperArtsy sets. The big circles for the Allium were applied through a stencil.
Paint used :
Vintage Lace, Eggplant, Pansy, Rose and Snowflake.
Background images stamped using Ranger archival ink- Blue Violet and snowflake paint.
Allium, butterflies and flowers stamped in black archival ink.
Stitching around the edge added with black pen.
I added some white pen to the portrait format card but decided to leave the other panel alone, I quite like the sketchy look of it without any colour added.
I love this set of stamps, I think I may be using elements of it a lot.
If you want to see close ups of Kay's beautiful work go check out her blog :
Sunday, 28 June 2015
Patchwork
I've lost my mojo. In an attempt to get it back I played with my patchwork die.
Stamp : PaperArtsy Lin Brown ELB16
Sentiment : Penny Black Snippets
Die : CREAlies Modern Patchwork No.1
Stamp : PaperArtsy Lin Brown ELB16
Sentiment : Penny Black Snippets
Die : CREAlies Modern Patchwork No.1
Sunday, 10 May 2015
Distress Markers meet Alcohol Pens
The sun is shining, Spring is here and it is still light after 8pm. I do love this time of year.
This weekend I have been having a go at the technique I learned from Kay Carley last weekend.
Have a look at Kay's beautiful work on her blog:
http://kaycarley.blogspot.co.uk/2015/05/may-class-at-glitter-pot.html
I cannot claim the colour schemes used on the flowers as my own as they are the same as Kay used on the example I saw in the demo but I shall play with this again using different colour schemes.
My first card uses the new Penny Black Demure stamp and for the second I used a Lin Brown flower for one of my PaperArtsy sets. The sentiments and sprigs are from Hobby Art sets.
This weekend I have been having a go at the technique I learned from Kay Carley last weekend.
Have a look at Kay's beautiful work on her blog:
http://kaycarley.blogspot.co.uk/2015/05/may-class-at-glitter-pot.html
I cannot claim the colour schemes used on the flowers as my own as they are the same as Kay used on the example I saw in the demo but I shall play with this again using different colour schemes.
My first card uses the new Penny Black Demure stamp and for the second I used a Lin Brown flower for one of my PaperArtsy sets. The sentiments and sprigs are from Hobby Art sets.
The flowers are coloured using Copics and the background stamping and watercolour effect is achieved with distress markers.
Enjoy what is left of the weekend,
Julia x
P.S. Note to self ..... I must do blog updates more than once a month!
Subscribe to:
Posts (Atom)